
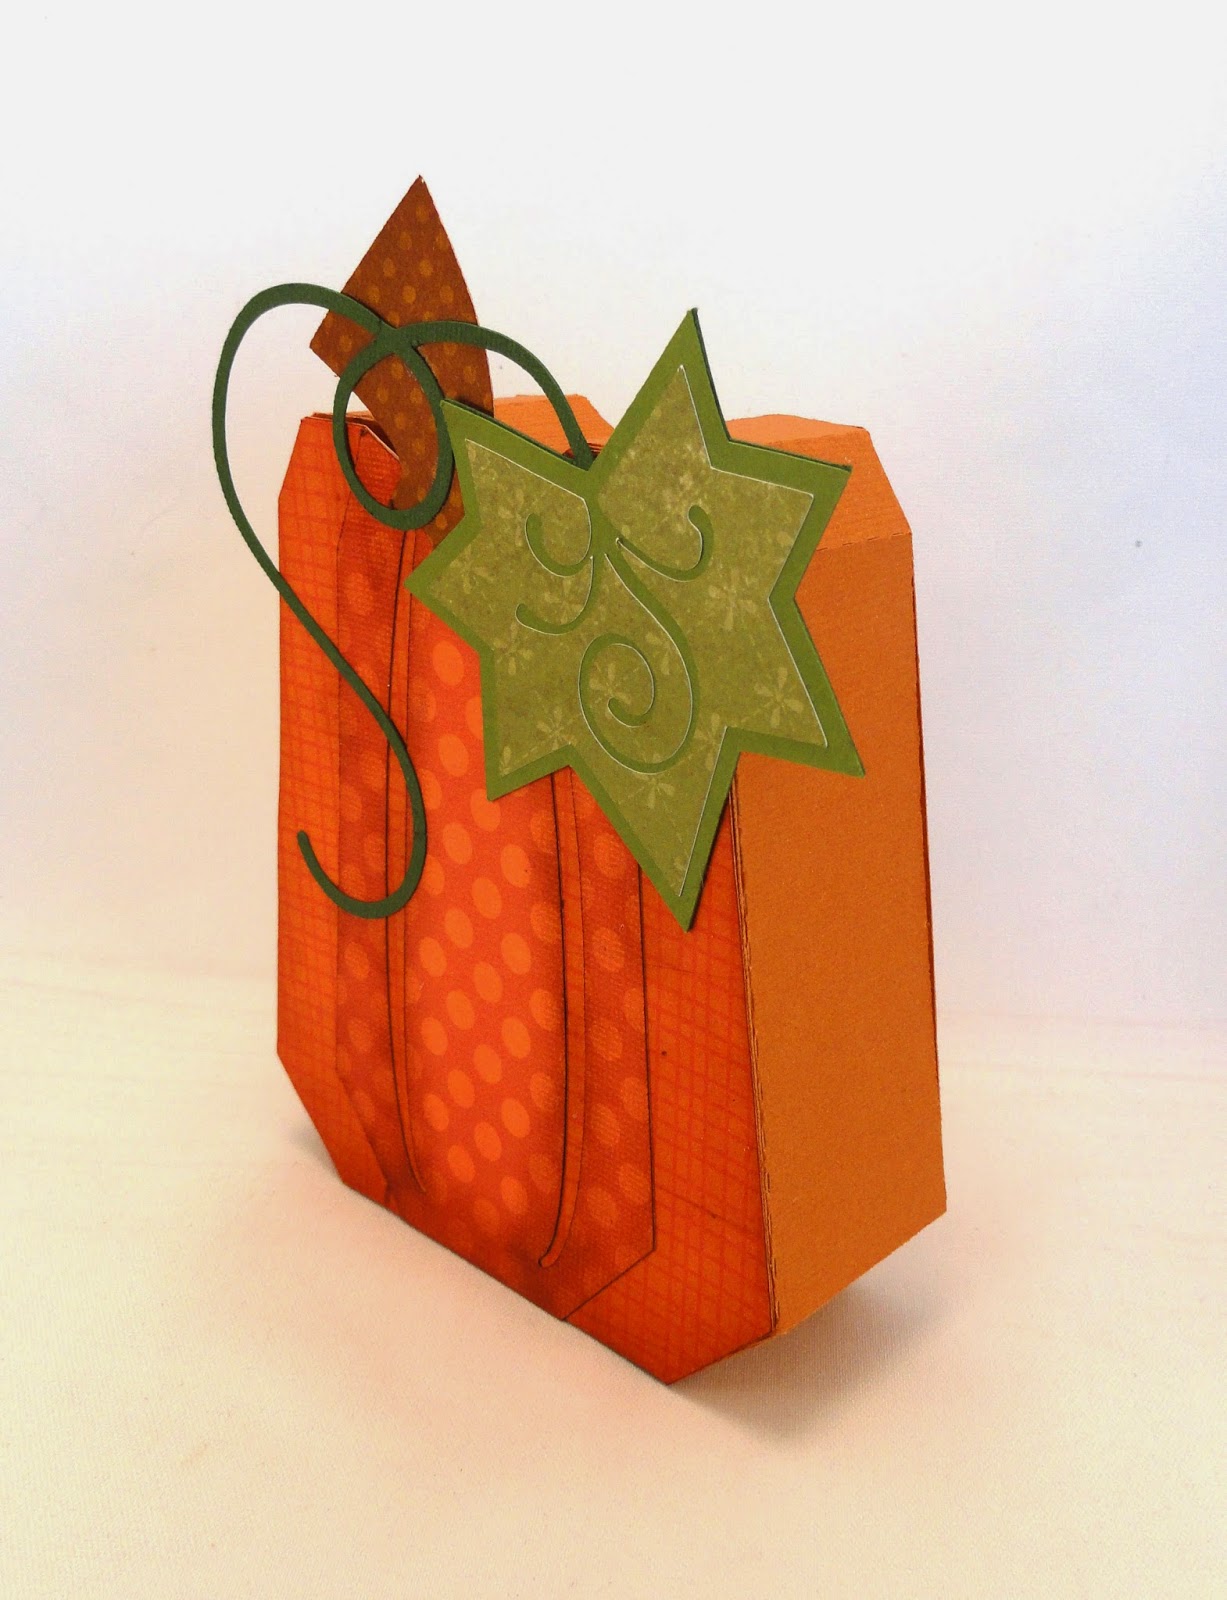
Decorate for fall and harvest
with this blocky
pumpkin with taper top,
décor front, stem and viny leaf.
Back trap door allows
for construction access
then closes up for a self-contained “box” block.
Box
measures approx. 5” tall x 4.25 wide.
Available for purchase and download from
SnapDragon Snippets, also through
Silhouette America online store, and
SVG Attic as part of a FALL Letter Box Ensemble.
(Search by that title here in the blog to see that project.)

ASSEMBLY:
1. Identify and cut the shapes.
A pumpkin box front
B top boxing strip (includes 'C's at center)
C bottom boxing strip
D pumpkin box back
E tap door 'key' cover
F front decor shapes
G letter front (used for the "FALL" ensemble

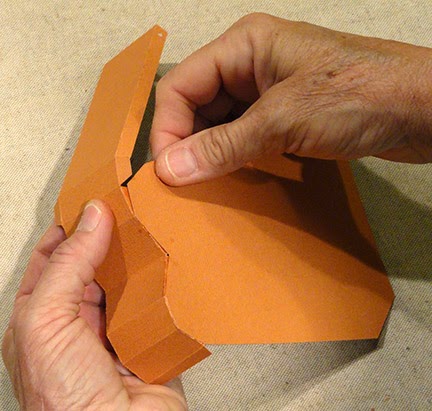
2. Fold the boxing strips on the vertical perforation lines, folding back (as mountain folds) on all except the center perforation line. The center is marked on each tab with a 'C', as shown by pointing finger here.
Fold all edge tabs back.

3. Identify where the "center" perforation will be positioned at the top center indent of the box front. Line up and overlap the straight edge (here on the left top) with the first tab perforation line to the left of the marked center perf. Glue first tab in place.

4. Fold the boxing strip so that the next straight edge lines up with the corresponding tab perforation line. Adjust and glue the second tab in place.
Complete all edge-to-tab seams for this "half" of the top boxing strip.
5. Continue working in the same manner to align and join the tabs and corresponding straight edges for the opposite half of the top boxing strip.

It may be helpful to turn the assembly over after tab and edge are initially secured in place and to place the face of the box on a flat surface. Press against the tab backside to firmly join to box front, and press into the corner as firmly as possible.
Complete all edge-to-tab seams for this "half" of the top boxing strip.
5. Continue working in the same manner to align and join the tabs and corresponding straight edges for the opposite half of the top boxing strip.
It may be helpful to turn the assembly over after tab and edge are initially secured in place and to place the face of the box on a flat surface. Press against the tab backside to firmly join to box front, and press into the corner as firmly as possible.

6. Line up and join the lower boxing strip edge at the appropriate end tab of the upper boxing strip.
7. Continue aligning and joining the edges and tabs of the lower boxing strip until all but last tab is joined. Prepare, align and join the end tab while simultaneously positioning and joining final edge tab to complete front edge.

8. Prepare the box back by folding the trap door along perforation so that it opens outward.

9. Fold the tabs of the boxing strips inward. Line up the box back shape with the boxing edges, then join corresponding tabs and edges.

It will be helpful to reach fingers into the box interior through the open trap door to apply pressure where needed to join tab and edge.

10. Once back is completely in place, glue the "key" shape in place to cover the hole.

Then, close the door into place, apply glue to the tab end, then apply pressure to join to lower margin of the back shape.

11. Assemble the front overlay decor shapes (including base front, center shape, stem, vine/leaf base shape with full leaf and decor leaf). Position over box front and glue in place.

12. If you are building the "FALL" letter box ensemble, the pumpkin holds the 'A' of FALL. Position and attach the large letter A, using regular adhesive, or dimensional foam squares (or equivalent) to the upper and mid center and side backsides.
Here is a preview of the FALL Ensemble, in case you're curious!

Here is a slight side view . . .

Could I put 2-3 mums coming out of the too of the box? Then maybe put something in bottom before closing to weight it?
ReplyDeleteThat would be "top" of the box! Sorry! :-)
ReplyDelete