
Remember the childhood fun of dying Easter eggs
with this imaginative 5x7 double bi fold card.
Show off your favorite pastel print papers
on the front four and interior three rectangle panels.
Then make a splash with paint brush
on the front medallion egg.
Many shapes provide interest,
but this free-standing card is really easy to assemble.

1. Identify and cut the shapes;
A main card base (ivory in this sample)
A main card base (ivory in this sample)
B inner card panel
C side inner panels
D front top panels, bottom panels
E front wet paint border accent shapes
F front decorations
NOTE that the decorative medallion base shown here already has the scallop edge shape (cut from double stick adhesive) attached to the scallop elipse base, and glitter-ized.
2. Pre-fold the left front as shown with medallion base right half allowed to extend unfolded.
Join the right side section to the left section at the long vertical tab. (Place tab on the backside of the right section.

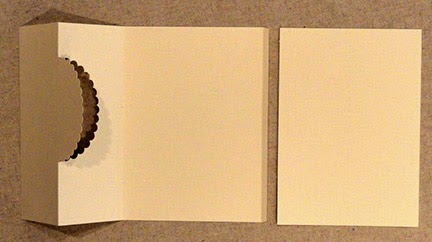
3. Fold the sides in on perforations so that the first vertical folds in from each side edge meet at the center, with the un-bent medallion base oval on top of the right side.
This is how the card will close when it is finished, too.

4. Assemble the front side panels by lining up top and bottom panels with edges touching (connect temporily with cello tape on the backside, if desired), then centering the wet paint borders over the joint and gluing in place.
Complete one, then make sure the other one matches the top straight edge as the second is positioned and attached.
(Remove cello tape after dried, if desired.)

5. Position each front panel over the front panel sections of the card base, with edges offset slightly from card edges as shown.

6. When the card is completed and ready to personalize, use the large egg shape as the inside panel for message and signature, etc.
If you have the option, you might consider using the "print and cut" feature to use a favorite font, decorative set up, and colored printing.

7. Prepare the "happy easter" panels by centering, aligning text shapes' base lines on their respective panel halves, then gluing word shapes in place.

8. Position each half over the lower front panels of the card, with center straight edges lined up at card folds, and the panel edges top and bottom also aligned.
Glue in place.

9. Prepare the medallion base shapes. You can simply cut the rim scallop as a contrast paper color (along with the optional inner elipse shape which was NOT used in this sample but IS included in the cut file), or cut the rim shape from double stick adhesive, attach and glitter-ize.
Peel the backing off the double stick cut shape, then carefully and patiently position it over the base scalloped oval and attach in place.

10. Peel the front liner off, then ...

. . . apply glitter.

Remove extra glitter with a dry brush.

11. Attach the wet paint egg top shape to the egg oval.
12. Position and attach the medallion assembly over the front of the card, matching the scallop cut right half edges of the card base for alignment.
NOTE that the medallion attaches completely, even though only half of the scallop edge is cut for positioning assistance.

13. Assemble the paint brush unit beginning with the base whole silhouette shape, then aligning and attaching the handle end, collar, bristles shape. Attach the wet paint tip over the bristles shape.
14. Position paint brush unit at an angle across the medallion lower portion, and attach where surfaces align.
Here is the completed card in closed position.

Here is the card in opened position
with egg "sentiment" panel in place.


 Fold back up, side tabs in, then attach side edges to side tabs.
Position and attach wet paint upper flap overlay.


with egg "sentiment" panel in place.
Assemble the companion "wet paint flap" envelope.
Fold front section at flap and tab lines.
Align and attach bottom edge of "back" flap
at tab perforation line on bottom of "front".
Position and attach wet paint upper flap overlay.
Here is the completed envelope, flap folded down.
No comments:
Post a Comment