

Seven nativity designs in delicate silhouette style
to cut from vinyl, attach to cut acetate or vinyl
insert shape, roll into a tube, and place inside
a 3" glass ball, add artificial snow
if desired, add bow or other decoration,
then feature on Christmas tree or other displays.
These scale-able vector graphic (svg) downloads
are available from SnapDragon Snippets,
SVG Attic, and Silhouette America's online store,
to work with digital cutting systems such as
the Silhouette Cameo (our favorite) as well as
Cricut Design Space and others.
Here is the set of designs:

ASSEMBLE: 1.Obtain glass ball ornaments.
Designs are sized 3.1" size which work well
with the "Celebrate It" balls
from Michael's Crafts;
also included are the slightly reduced designs
for the 2.6" balls.

2. Cut the selected size design from vinyl.
Since these designs are very small, several may
be set up in one or more rows when
preparing to cut. Allow space between the
preparing to cut. Allow space between the
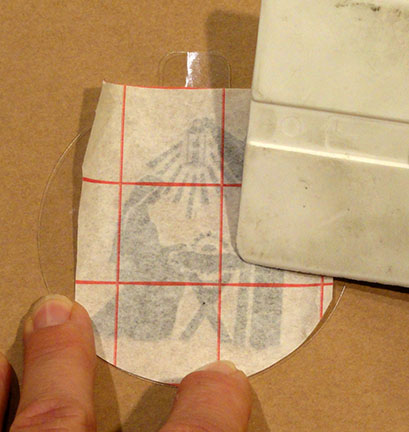
designs for trimming. Trim each with a small
margin around the component cuts, like the area
of white backing shown on the "Holy Family" design
being modeled in the image below.
NOTE that a good choice is "outdoor vinyl"
such as Oracal 651 which has a stronger adhesive
to help keep tiny pieces attached to backing
during the weeding procedures.
such as Oracal 651 which has a stronger adhesive
to help keep tiny pieces attached to backing
during the weeding procedures.
3. The tiny details of these designs will require careful
and slow weeding to remove all excess around
and within the design components.
Refer to the thumbnails
which appear with the downloads,
or to the image above to preserve only the design.
4. Cut the ball insert shape from clear acetate.

5. Cut a piece of transfer "tape" paper,
remove backing, and place over the weeded
vinyl design.

6. Use a "scraper" to "burnish" the transfer paper
over the vinyl pieces to ensure they will be picked
up correctly and completely.

7. Carefully peel away the vinyl carrier sheet
leaving ALL vinyl pieces attached to the
transfer paper.

8. Position the vinyl on the front of the
clear ball shape.
One way to do this is (without a lot of inadvertent sticking
of transfer tape) to place the clear ball shape
of transfer tape) to place the clear ball shape
ON TOP of the carrier with vinyl and
adjust the vinyl design compared to the ball shape
adjust the vinyl design compared to the ball shape
up/down and side-to-side.
Once desired position is determined, trim away the
transfer paper even with the clear ball shape.

Next, move the clear shape to be in its final position
BEHIND the vinyl/transfer paper, aligning the lower
edges of both, and visually adjusting before
allowing the transfer paper to "stick" in final position.

9. Burnish with scraper tool to attach the vinyl
shapes to the front of the clear ball shape.
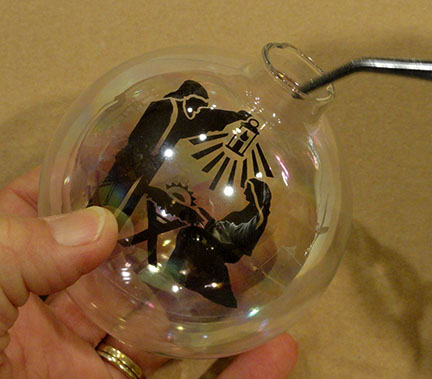
10. Carefully peel away transfer paper,
making sure that each tiny detail of vinyl
remains in position attached to the acetate.

Here is the completed acetate shape.

11. Remove the top cap and wire loop of glass ball.

12. Carefully roll the completed design side-to-side
with vinyl on the inside . . .

. . . then insert the roll through the ball stem.

When the acetate unrolls, make sure that it
self-adjusts to be in the center of the ball
with the "stem" extension in the ball's neck.
Straighten, if necessary, with tweezers.
13. Replace cap and wire loop.

14. If desired, add some fake snow flakes
into the bottom of the ball prior to
re-attaching the cap and loop.
Embellish with ribbon at stem as desired.

Love it!!!
ReplyDeletelove this, is there a video? I don't understand the how to use the acetate part. how do you cut a perfect shape of the ball for one and when to apply the acetate?
ReplyDelete