
Attached, folded tree decorates the left edge of
quickly-assembled flat card with optional back easel
that can fit into a 5x7 envelope.
Use
two-tone (front and back) card stock
for the contrast effect between swoop
boughs and
edge-decorated punch circles.

Shapes also included for front offset
accent
base panel, with accent two-layer panels and
word cuts “Merry” and
“Christmas”, back sentiment panel.
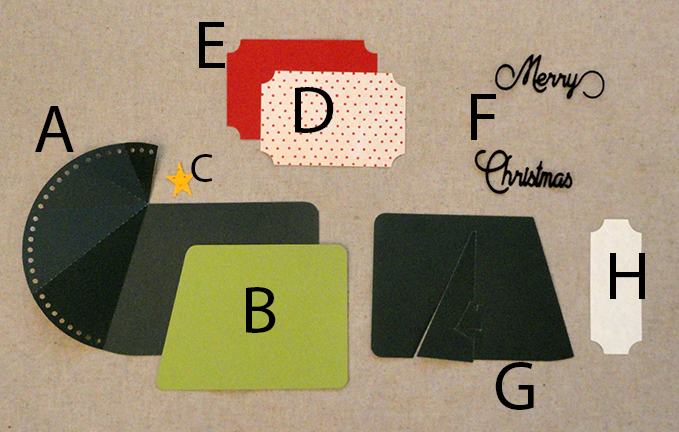
ASSEMBLY: 1. Identify and cut the shapes:
A main card base: cut from two-tone (front/back) card stock
B front accent offset panel C tree star
D front plaque accent panel
E front offset plaque accent base
F 'Merry' and 'Christmas' word cuts
G back panel with easel cut out H back sentiment panel
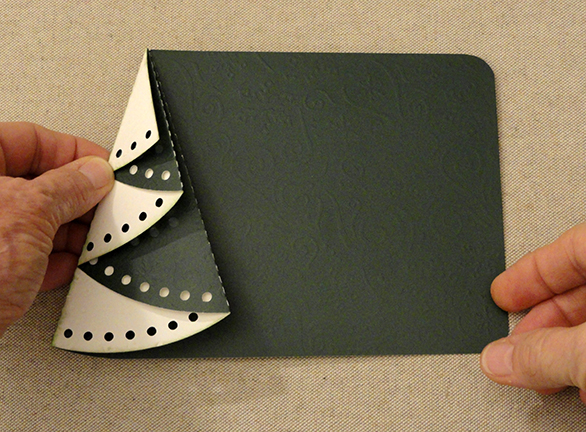
2. Prepare the main card base by bending on tree
perforations, beginning with "valley" fold at longest
line (indicated by pointing finger), then
alternating as "mountain", then "valley" and
so forth moving upward.
so forth moving upward.

and crease well.
4. Use sticky dots or equivalent to attach the right side
tree layers together - attaching under the overlapping
segment, centering the dot.
NOTE: leave the bottom-most section free
for now (the one overlapping the card face)

side overlapping segments.

5. Position and attach the offset accent face
to the front of the card.

6. Position and center the smaller front accent plaque
shape onto the plaque base, and attach together.

7. Position the plaque onto the card front so that
it is centered to the top edge width, and near
the upward portion of the card front, and attach.
8. Apply sticky dots to the underside of the tree
near vertical center line (allows dimension to remain)
then press the tree into position over the card front.

9. Position and attach the word cuts.

(NOTE if the star is too high, the card may NOT
fit into a 5x7 envelope, so if you plan to enclose
in a card for gifting or sending, check the positioning
before final attachment).

11. If using the plain back, position it on the backside
of the card to reinforce and strengthen the card.
Also position and attach the sentiment plaque.
12. If using the optional easel back, prepare it by
bending easel 'triangle' back toward the right,
then replacing it into flat position.
Also bend the latch down along the perforation,
then replace to flat position.

(seen from the backside)
with the triangle easel at perpendicular vertical,
and the latch bent down with the notch flexed to
hold the easel cut out edge fixed so it will stand.
NOTE: the backside face area visible from this side
is the ONLY portion that will have adhesive applied.

14. Apply adhesive as described above, then
position with offset margin at rounded edges top
and side. At the bottom edge . . .

. . . the protrusion of the easel triangle should
be even with the card base bottom edge.

Attach in place, making sure that the easel
and latch DO NOT attach to card back.

15. Position and attach the narrower sentiment
plaque in the area shown.

latch/brace.

with back easel.


No comments:
Post a Comment