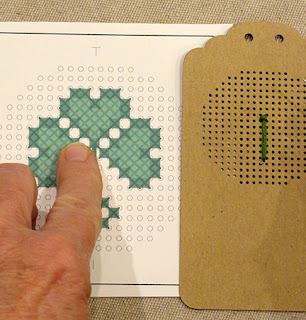
A6
side-fold card becomes a keepsake treasure by
hand cross-stitching a single
long stem rose bloom
onto the stitching holes-punched offset front panel.
Round-corners
window is positioned off center
on the front accent panel to showcase the
stitching
with “MOTHER’S DAY” printed as “print & cut” panel
(optional
plain front panel also included).
Sentiment is completed as two-layer “happy”
welded word.
Cross stitching pattern included.
Card measures approx. 4.63” wide
x 6.25” tall when closed.
ASSEMBLY: 1. Identify and cut the shapes:
A main card base
B hole-punched stitching panel (2 to layer for strength)
C contrast margin overlay panel
D front frame overlay, print & cut with "MOTHER'S DAY"
E happy welded word cut with offset base

by Silhouette America's online support to set up
the front panel on screen, send to printer, prepare
for cutting, then cut out.

remaining "chads" or cut out crumbs. One way to do this
is to un-coil a basic paper clip to use the end as a tool
to poke through each hole on the whole array of both.
Turn the shapes over to brush or scrape away punches.
 For the tiny holes where half stitches will fall between

the regular "squared" stitch holes, use a smaller diam.
tool such as the tapestry needle that will be used
to complete the stitching, to make sure they are open holes.
 4. Layer and attach together the two stitching panels,

taking care that all cut edges as well as the holes
align as precisely as possible.
 One way to do this is to use the paper clip tool

to push through the corner holes of the joined
layers to make the adjustment, if necessary.
 Once the panels are joined and adjusted,

press flat using a heavy flat weight such as this thick
book volume, with something else heavy on top
until the glue is completely dried, usually several
hours or over night.

including three closely-matched colors for bloom,
and three related greens for leaves, sepals and stem.
For the sample project, these are the floss colors chosen:
lightest pink 350 for main rose body
lightest pink 350 for main rose body
med pink 309 for rose body side shading
darkest pink 814 for rose tip shading
bright green 471 for lightest leaf & sepal shading
deep green 3362 for darker leaf & sepal shading
darkest green 895 for stems

such as this recommended tapestry needle size 24.


STITCHING INSTRUCTIONS
6. Cut a 24-30" length of 6-strand floss, then separate
two strands then lay them together . . .

. . . fold the lengths in half . . .

. . . and thread the four ends through eye of a blunt tip darning
needle size 24/26 (recommended). Pull the ends
part-way down - the loops will remain as the long end
and will be used to "tie on".

7. Study this diagram to understand how to form
cross stitches for uniform appearance and tension.
NOTE that the RIGHT SLANT stitches are generally
placed across the row first, followed by the LEFT SLANT
stitches placed coming back across the row.
8. Create a print out of the rosebud stitching diagram
(or simply view it on-screen).
9. Make the first few stitches:

A) Insert the loaded needle UP from backside through
the hole of the FOUR holes that will create
the first 'X" of the top left sepal "leaf" tip.

Pull needle and thread through leaving approx. 3-4"
of loop "tail" still on backside.
B) Insert the needle into the bottom right hole of first 'X' . . .
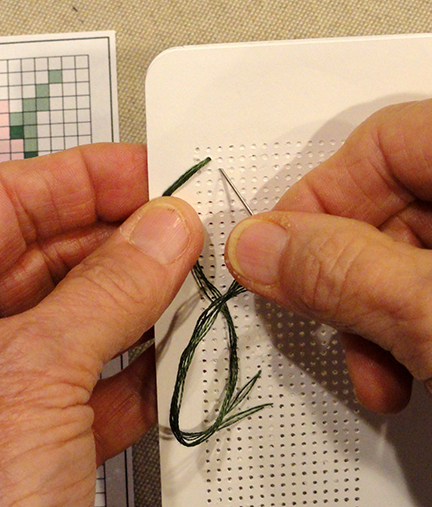
. . . and pull through until front thread is nearly flush with surface,
and short loop remains on the backside of the panel.
Pass the needle through the loop and cinch the thread up
firmly on the back.
This completes the "tie on" step.

10. Continue by inserting the needle in the top RIGHT
hole of the first 'X', pull thread full fully, then
insert into the bottom left hole that will . . .

. . . complete the first 'X'.
11. Next, continue stitching the next short "column" of
three green stitches, completing . . .

moving downward. Then, move back toward top of
the column to create the right slant stitches and
complete the 'X' stitches.

12. Continue in the same manner to begin and complete
the stitches of the same color on the chart.
When loaded needle needs to transition from panel
backside at one place where adjacent stitches have
been completed to a different location where stitches
can continue, pass the needle under the stitches in
the pathway to emerge (still on backside of work),
in the position to continue stitching.
When floss length on needle gets close to being
too short to continue, pause in mid stitch when needle
is pulled through to backside, then slip the needle under
the adjacent 4-5 stitches. Pull the needle fully through,
then trim tail beyond stitching, remove needle and re-thread.

load the appropriate floss color, then repeat
the "tying on" process and complete the "color block".
 14. The rose bud design includes half stitches along

the "seam" between the two leaf colors.
At this positions - three on each leaf - there are tiny
holes punched that will accept the diagonal left or
right half stitches in the same manner.
 15. For this design, the stem stitching up center line

and leaf stems are completed with alternating
straight stitches. To complete these, tie on at the base
of the bud, complete the triangle of stitches there,
then continue downward to complete straight
stitches with spaces in between. When the floss and
needle reach the bottom of stem . .

. . . continue back up the line to add stitches at the spaces.
Where the branch stems positions are reached, re-direct
the straight stitches up between the leaf halves,
then pass the needle back to where other stem can
be stitched. Finally, continue back up the stem until
all required straight stitches are completed.
Tie off in the usual manner.
This completes the cross stitching.

A) position and attach the window accent layer
with window opening edges evenly spaced around
hole cut outs, and outer edge just beyond the cut
edge of the stitching panel, evenly all around.
 B) position and attach front window panel

with window cut out edges aligned, even offset
margin remaining revealed all around.
(Press the assembly under heavy flat weight.)
 C) Position, centered, and attach word cut out onto

offset base word cut.
 D) position and attach the "happy" word cut assembly

onto the card front just above the printed words line,
and centered left to right in the plain margin.
 E) position and attach the front assembly onto

the front panel of folded card base, with even
offset margin revealed all around.
 F) tie a neat bow from 6-ply floss, then glue to

stitching panel at stem just below bud, if desired.
Paint the floss cut ends with clear nail polish.
 Here is the completed card.