
Hollow
center candle ring or small-scale wreath
features evergreen and cedar sprigs,
rolled ponderosa needles sprig,
and miniature holly stem greenery.
(Shown here with the hexagon center structure
that assists attachment to Candle 3D Chunky Drips project;
center can be holly circle for ALL layers.)
(Shown here with the hexagon center structure
that assists attachment to Candle 3D Chunky Drips project;
center can be holly circle for ALL layers.)
Three base sprig
rings provide foundation.
A low-relief base riser added above sprig ring bases
assembly
can provide some dimensional "lift".
Add generous multiples
of slightly-curled greenery sprigs
and stems in "layers" all around
on riser,
or simply on top of rings.
Add on optional berry pic elements for
added variety as desired.

Designed to fit on the "Candle Stand 3D
Display"
with the "Candle 3D Chunky Drips".
Measures approx. 4.5"
diameter.
ASSEMBLY: 1. Identify and cut the shapes:
A riser base
B cedar sprigs ring
(sample project is using the cedar ring
that includes the middle hexagon shape
for use with the candle stand project)
C fir springs rings 1 and 2
D individual cedar sprigs (12 short, 12 long)
E individual fir sprigs (12 short, 12 long)
F ponderosa sprig units (12)
G holly sprig (18)

 3. Stack the three spring rings, cedar on the bottom,
fir on top, using the north/south notch cutout
on the interior of the ring to line up the layers.
Glue stacks together at ring.


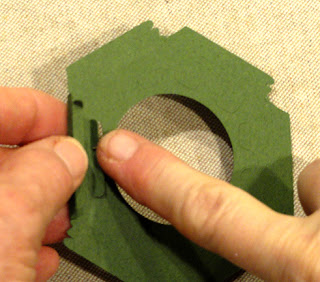


 12. Prepare the holly leaves by scoring a center line,

 13. Prepare the ponderosa sprigs by bending stem
in half at stem end, and . . .


 . . . roll the stem-attached edge tightly, and . . .
 . . . continue rolling until all width is tightly rolled,
adding glue along base strip as needed to keep
needles straight and stacking.
 15. Use the curling tool to flick the needle ends back
slightly, spiraling around "center".

 b) add long fir strip above previous cedar and attach
to the inner "vertical" wall.
c) continue to add alternating type of sprigs
more or less evenly spaced (very close to each other
and possibly overlapping slightly), placing long sprigs
along top of wall, shorter sprigs attaching to inner wall.
Try to imitate the curve and outer boundary of
the ring stack.


2. Add some curl to the cedar and fir ring sprig
extensions by pulling each individually across
a rod tool such as this knitting needle, or something
similar (think curling ribbon).

fir on top, using the north/south notch cutout
on the interior of the ring to line up the layers.
Glue stacks together at ring.

4. Prepare the optional riser by bending back on
the side wall perforation lines so that each can
form a "tunnel" at the edge of the hexagon.
Also bend the outer-most tab forward.

5. Bend the interior tabs back past perpendicular,
away from the platform so that they catch the lead
edge of the corresponding wall.
6. Apply glue to the tab backsides and attach
to the inward short wall face, then . . .

. . . push the outer wall face up to something perpendicular]
such as the wood block shown here, to ensure
that the wall achieves upright positioning as the
riser assembly continues.

7. Repeat the process of "curving" the next wall section
back to form the "tunnel", with the tabs pushed downward
and bent back to attach to the inward wall edge,
using the block or other push-against surface to keep
the wall at ninety degree angle as much as possible.

8. Where the two wall tunnels converge, the end tabs
at outer face and inward face should overlap
the adjacent wall surfaces and attach.
Repeat the wall assembly steps for the remaining
wall sections, taking care as the final wall is
prepared and positioned to tuck end under tabs.

Here is the completed riser unit.
(It isn't very deep, but will serve to lift the sprigs
and give the wreath dimention.)

9. Position the riser on top of the ring stack,
using the interior edges to center it, then glue in place.

NOTE: that the hexagon base broken circle edge
is a registration edge for the riser's inner circle curout.

NOTE: an attractive lower-relief mini wreath or
candle ring can be crafted without the riser.
Simply layer the sprigs in place described
onto the rings stack - without the riser.
10. Get familiar with the individual sprigs that will
be used to complete each side of the wreath ring.
Shown here at left is the riser base.
FOR EACH OF THE SIX RISER HEX SECTIONS:
prepare 3 holly leaves, 2 ponderosa sprigs,
2 short & 2 long cedar sprigs,
2 short & 2 long fir sprigs

11. Add some curl to the sprigs, particularly
at the middle and tip end.


then curl as for other elements.

in half at stem end, and . . .

. . . gluing the two halves together along stem
to bottom of perf line.

14. Add curl to the needles portion, then . . .


adding glue along base strip as needed to keep
needles straight and stacking.

slightly, spiraling around "center".

16. Determine an arrangement for first side of wreath
riser, then repeat the arrangement for all size sides.
The sample project arrangement will be described
as a potential placement pattern.
a) attach short cedar sprig at (right) edge of riser section,
on top of the wall;

to the inner "vertical" wall.
c) continue to add alternating type of sprigs
more or less evenly spaced (very close to each other
and possibly overlapping slightly), placing long sprigs
along top of wall, shorter sprigs attaching to inner wall.
Try to imitate the curve and outer boundary of
the ring stack.

d) tuck ponderosa sprig stem under sprigs top layer
and attach to wall top, placing one near lead edge
and lower, and one at center and higher;

e) tuck three holly leaf stems into the layers
to attach to wall top or inner wall,
evenly spaced across the wall segment.

Here is the first riser side with all sprigs in place.

17. Repeat the sprig attachment for each of
the remaining sides of the riser.
Add a tiny sprig or more on side-front of the completed ring.

18. The chunky candle can fit inside the ring
as long as the sprigs are attach to the inner
upright wall, and don't overlap much onto
flat interior ring base.


