Wednesday, March 4, 2015

Bunny Upright 3d Box Assembly Guide

Perky little bunny box for Easter display or gifting
is built as a lid with dimensional ears and nose
that fits over a narrowed-top box base.
Embellish as you choose with provided layered carrot,
whisker shapes, nose with highlight, eye cutouts with back panel.
Measures approx. 4.5" tall x 3" wide.
Build one for a shelf, fill it up to give in an Easter basket,
of create a whole bundle of bunnies on your Easter buffet!


1. Identify and cut the shapes:
A lid body front
B nose dimensional shape and overlay
C backing for eye cut outs
D ears and inner ears
E carrot assembly (base, top contour, 2 green tops)
F lid body back
G boxing strip for lid
H base box


2. Apply glue around the eye cut outs on the backside of the lid front. Position and attach the backing rectangle above the nose cutout and so that it surrounds the eye cut outs completely.


3. Prepare the dimensional nose hex mini box by folding on the hex perf lines, on the side tab lines, and fold the top tabs outward.

Build the mini box by bringing the short straight side edges overlapping and in line with the corresponding perf side line of the adjacent shape, and glue tab behind edge. Repeat for all 6 seams.

(Do your best to align edge and tab perf line for accuracy. If it is difficult to fit a finger tip inside the box to assist as the seams are joined, use the end of a narrow tool such as the spatula tool, a bamboo skewer or knitting needle, etc.)

4. Attach the accent (pink) nose shape to the front of the hex mini box.

5. Insert the nose through the hex opening on the body front from back to front. Slide it all the way in so that the front opening edges seat fully at the box tab perf lines. Then . . .


 . . . glue the tabs in place on the body back side.


6. Glue the left and right whisker shapes to the body front, with inner edges abutted to the nose box side. 

(If you plan to add a little cheek color, apply that before the whiskers are glued in place.


7. Prepare the boxing strip by folding tabs on both edges inward, also bending the strip on the cross perforation lines.

8. Align and join the center top tab to the top of the body front, with straight body edge overlapped to the tab perforation line and adjusted so that the ends of each match up.


9. Bend the left and right sides, one at a time, into position to align and join each of the edge segments to the corresponding tab perforation line all along each side.


10. Attach the inner ear (pink) to the front of the corresponding left or right main ear shape. NOTE that the bottom tab shapes of each will align on three sides to help with centering the inner ear correctly.


11. Before the each assemblies dry completely, add some curl to each ear by running the ear between a tool such as the spatula handle shown here and thumb (think curling ribbon). 


12. Insert the first each tab into the slot on the top section of the boxing strip.


On the inside, bend the tab forward and glue in place to the backside of the boxing strip.


13. Insert the second ear behind the previous ear, bend the tab back, and glue in place.


14. Bend the back body tabs inward to be perpendicular to the boxing strip.


15. Position the body back over the back tabs, align the top segment straight edge with the top tab perf line as was done for the box front and attach. Work along each side to join the remaining boxing tabs to the corresponding edges of the body back until all are attached. 


16. Fold the opening edge tabs/flaps back into the body cavity and glue in place.


17. If desired, wrap twine around body below nose and face area several times and tie into knot and bow.


18. Assembly the carrot decoration by beginning with silhouette base shape (includes carrot and stems top shape) with carrot contour shape on top, darker center top stems then outer brighter stems shape.


19. For added dimension, attach foam squares to the backside of the carrot.
(NOTE: experience showed that the tip end foam square showed too much, so leave it off. Only use the top two squares.)


Attach carrot decoration at an angle to the box front.


20. Prepare the box base by folding as shown, with all sides, front and back and tabs bending back.


21. Form the shape into a box by bringing the side tab perf lines to line up with the corresponding straight edges of the front and back panels (front and back overlap tabs) and glue in place.

Repeat the edge to tab joining for all four sides.


It may be helpful to use a tool to reach into the base box interior to provide a surface to apply pressure against as the tabs are joined to the box front or back.


22. Fold the top tabs/flaps into the base box interior and glue in place to form the rim.


23. Insert the base into the bottom of the lid. NOTE that this is a very tight fit.


Slide the base all the way in so that it is not visible at the bottom of the lid.


To get the base out again, use the finger tab/hole. (It may be necessary to insert a narrow rod tool to assist with the retraction of the base.


Here is the finished bunny box.

Easter Basket Large Decor Display Assembly Guide

This large decor piece which measures approx.14" tall 
when assembled,demands attention!
Cut using 12x12 sheet of card stock for the basket
and brad-attached handle shapes, with a simple wide-top "box"
hidden and attached at the back to provide its own "stand".
(It works fine empty, but you could fill it with ballast.)
Layers make it sturdy enough for handle to support
three mini dimensional carrot "danglers", 
designed as slice forms to go together quickly.


ASSEMBLY:
1. Identify and cut the shapes:
A basket offset base and overlay
B horizontal reeds
(NOTE cut file also includes vertical ribs that can also be cut as contrast if desired)
C bottom decor shape overlay
D basket handle and dupl. reinforcement
E handle "knob" shapes
F box "stand"
G 3d slice-form carrots
H Happy Easter layered phrase shapes (3)


2. Attach the basket overlay to the base shape. NOTE that the overlay and base top edges are not offset but align.

3. Attach the cross rib and base decor  shapes over the overlay with corresponding edges lined up.


4. Layer and attach the three shapes that created the "Happy Easter" panel.

(NOTE: this is the cut file design. The model phrase panel was modified after the photographs were taken.)


5. Attach 6 or 8 large foam squares to the back of the panel to give it dimension when attached to the basket panel. Then center and attach near the top of the basket assembly.


6. Prepare the box "stand" shape by folding at the perforation lines as shown. To assemble the box, attach the bottom tabs to the corresponding (overlapped) edges, then the side tab and edge.


7. On the backside of the basket/overlay assembly, center the box side to side, also line up the bottom edge so that NO box edges show from the front. This will place the box bottom edge slightly above the scalloped basket bottom edges. The result will be a slight backwards lean when the basket is standing, which is desirable.


8. Prepare the handle. Layer and attach at least one duplicate handle base shape behind the decorative front handle shape. (NOTE: a plain "without knobs" handle form is included in the cut file as an optional decor or reinforcement shape.)

9. Attach the "knob" shapes to the handle. Make sure the top center knob position uses the shape with the hole cut out.


10. Prepare the slice form carrot dimensional danglers. Each carrot requires 4 orange base shapes and 4 green top shapes. Bend carrot and top shapes on the center perforation lines, face side together, at a 90 degree angle. Glue a top shape to each base shape to prepare a quarter carrot. Repeat the folding at perforation step for glued shape assemblies.
11. Place two quarter carrot shapes with backsides of halves together) (take care to align all edges and glue. Repeat for the other pair. Place the two half assemblies back to back and glue. Before the glue has set, insert a 7" length of fine craft wire into the center space - use extra glue to secure the wire as needed.


12. Dry-test the carrot danglers to determine how long the wire should be, then bend the wire at the appropriate length (where it will insert into the handle holes - center and sides may be different lengths). Trim the excess wire approx. 1/2" beyond bend for back attachment.

Once final adjustments are made, bend the wire flat on the handle backside and securely glue the in place using a thick adhesive such as hot glue or Fabri-Tack. Allow to dry thoroughly before manipulating handle further.


14. Place the handle ends over the basket front assembly and attach securely with brads.

(Handle ends could be glued into place. Keeping the handle detachable lends to easier storage options.


A final view of the completed basket display.

Egg Paint Double Bi-Fold Card Assembly

 
Remember the childhood fun of dying Easter eggs
with this imaginative 5x7 double bi fold card.
Show off your favorite pastel print papers
on the front four and interior three rectangle panels.
Then make a splash with paint brush
on the front medallion egg.
Many shapes provide interest,
but this free-standing card is really easy to assemble.


1. Identify and cut the shapes;
A main card base (ivory in this sample)
B inner card panel
C side inner panels
D front top panels, bottom panels
E front wet paint border accent shapes
F front decorations

NOTE that the decorative medallion base shown here already has the scallop edge shape (cut from double stick adhesive) attached to the scallop elipse base, and glitter-ized.

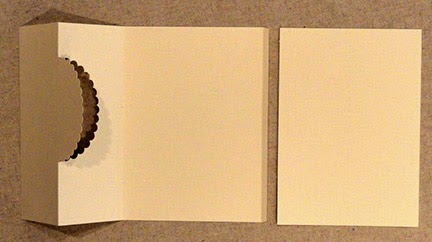
2. Pre-fold the left front as shown with medallion base right half allowed to extend unfolded.

Join the right side section to the left section at the long vertical tab. (Place tab on the backside  of the right section.


3. Fold the sides in on perforations so that the first vertical folds in from each side edge meet at the center, with the un-bent medallion base oval on top of the right side.

This is how the card will close when it is finished, too.


4. Assemble the front side panels by lining up top and bottom panels with edges touching (connect temporily with cello tape on the backside, if desired), then centering the wet paint borders over the joint and gluing in place.

Complete one, then make sure the other one matches the top straight edge as the second is positioned and attached.

(Remove cello tape after dried, if desired.)


5. Position each front panel over the front panel sections of the card base, with edges offset slightly from card edges as shown.


6. When the card is completed and ready to personalize, use the large egg  shape as the inside panel for message and signature, etc.

If you have the option, you might consider using the "print and cut" feature to use a favorite font, decorative set up, and colored printing.


7. Prepare the "happy easter" panels by centering, aligning text shapes' base lines on their respective panel halves, then gluing word shapes in place.


8. Position each half over the lower front panels of the card, with center straight edges lined up at card folds, and the panel edges top and bottom also aligned.

Glue in place.


9. Prepare the medallion base shapes. You can simply cut the rim scallop as a contrast paper color (along with the optional inner elipse shape which was NOT used in this sample but IS included in the cut file), or cut the rim shape from double stick adhesive, attach and glitter-ize.

Peel the backing off the double stick cut shape, then carefully and patiently position it over the base scalloped oval and attach in place.


10. Peel the front liner off, then ...


. . . apply glitter.


Remove extra glitter with a dry brush.


11. Attach the wet paint egg top shape to the egg oval.

12. Position and attach the medallion assembly over the front of the card, matching the scallop cut right half edges of the card base for alignment.

NOTE that the medallion attaches completely, even though only half of the scallop edge is cut for positioning assistance.


13. Assemble the paint brush unit beginning with the base whole silhouette shape, then aligning and attaching the handle end, collar, bristles shape. Attach the wet paint tip over the bristles shape.

14. Position  paint brush unit at an angle across the medallion lower portion, and attach where surfaces align.


Here is the completed card in closed position.
Here is the card in opened position 
with egg "sentiment" panel in place.

Assemble the companion "wet paint flap" envelope.

Fold front section at flap and tab lines.
Align and attach bottom edge of "back" flap
at tab perforation line on bottom of "front".
Fold back up, side tabs in, then attach side edges to side tabs.
Position and attach wet paint upper flap overlay.
Here is the completed envelope, flap folded down.