
Iconic folk wear footgear for display,
to hold a
gift or decor items,
or to serve treats to eat.
Four-part hull can have accent
shape panels,
with or without contrast rim edge shapes,
with two-part stem with
heart flourish
for one or both sides.
Shoe measures approx. 7" long.
ASSEMBLY: 1. Identify and cut the shapes:
A & B main body shapes
C front (toe) center panel
D back (heel) center panel
E & G body accent shapes
F & H side rim accent shapes
I front (toe) center panel accents
(one panel for front is not shown here)
J front rim accent
K back (heel) center panel accent
(one of front accents is shown near K)
L back rim accent
M flourish shapes with heart shapes decorations

 3. Identify the front center seam tab
that includes the tiny circle symbol . . .
 . . . and corresponding symbols in side tabs
near back section center seam edge.
4. Overlap straight edge of back panel
over center seam tab, adjust for side to side
alignment, and join seam.

 6. Adjust and bend center panel to position
the next segment to align at the corresponding
straight edge of shoe main panel, adjust and
glue in place.


 11. Position accent over shoe side panel,
offset slightly inward from edges, with
perforation lines lined up, and attach in place.
Repeat for opposite shoe side panel.

 13. Position and attach back (heel) accents
in similar manner.
 14. Position and attach rim accents onto sides,
toe and heel accent edges.

 16. Position flourish on side of shoe as desired,
with heart at center (hiding alignment holes),
and attach in place.

 For an alternative decoration,
consider using the windmill tag (without punch hole)
over flourish, etc.

A & B main body shapes
C front (toe) center panel
D back (heel) center panel
E & G body accent shapes
F & H side rim accent shapes
I front (toe) center panel accents
(one panel for front is not shown here)
J front rim accent
K back (heel) center panel accent
(one of front accents is shown near K)
L back rim accent
M flourish shapes with heart shapes decorations

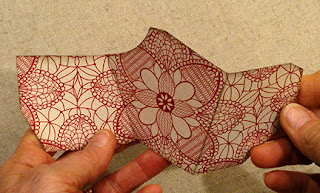
2. Prepare the center strip sections by bending
back on all panel and side tab perforation lines.
(These lines may be re-directed when attached.)

that includes the tiny circle symbol . . .

near back section center seam edge.
4. Overlap straight edge of back panel
over center seam tab, adjust for side to side
alignment, and join seam.

5. Begin to join center panel to (right) main shoe
panel by lining up top tab along edge segment,
overlap straight edge over tab, and glue in place.

the next segment to align at the corresponding
straight edge of shoe main panel, adjust and
glue in place.

7. Continue to adjust and attach each center panel
tab to corresponding shoe main edges until
the final tab and straight edge are lined up.

8. Repeat the process to position and attach
the second shoe main shape to opposite
center panel side tabs.

9. Bend front center panel tab inward and
glue in place to backside of center panel.
Repeat for the back tab.

10. Prepare the side accent panels by
bending slightly at the "relief" perforation lines
as shown (back as "valley" bend;
front as "mountain".)

offset slightly inward from edges, with
perforation lines lined up, and attach in place.
Repeat for opposite shoe side panel.

12. Position front (toe) upper accent panel
in corresponding position over center panel,
lining perforation lines up, with offset margin
as shown. Position toe accent panels over
corresponding segments of center panel
in same manner, noting that "connecting"
accent edges extend to perf lines as "seams"
and not offset. (Paper thickness may affect
fit; trim excess as needed.)

in similar manner.

toe and heel accent edges.

15. Prepare optional decoration shapes
by stacking and joining heart front to base,
aligning center punch holes of flourishes.

with heart at center (hiding alignment holes),
and attach in place.

Here is decorated wooden shoe container.

consider using the windmill tag (without punch hole)
over flourish, etc.

No comments:
Post a Comment