A special dimensional card to send greetings of
affection,
happy birthday, Happy Father’s Day or retirement.
Round card base
has underneath panel that bends
to display the attached 3D bucket hat tipped at
an angle.
Hat is built from 6 wedges, with top hexagon
that fits inside with
edge flange.
Details include “band” with eyelet hole, brim edge trim,
fish hook and lure to tuck or attach.
Attach the double-layer sentiment panel with arch banners,
“gone fishin’ and fish to provide the “stop” for
the easel mechanism.
Card measures approx. 5” x 5” x 1.75” deep
when closed. Tuck the hat card inside a custom-fit
container companion design (Fishing Reel 3D Gift Box).
ASSEMBLY: 1. Identify and cut the shapes:
A card base (two joined circles)
B front panel whole circle
C back panel whole circle
E interior upper accent
F interior lower accenty
G banner two layers with "gone fishin'" word cut
and fish
H stop panel (2)
I card front accent (fish cutouts disc)
J hat attachment flange
K hat wedges (6) L hat top hexagon
M hat button (circles to layer for build up 7-8)
N hat band shapes (6) O hat rim shapes (6)
P fly base, head and wings
Q lure base and body R hooks (1 left, 1 right)
to provide enough 'lip' to catch the front easel panel edge.
the 'stop' panel where the edges of each should line up,
and attach. Press under a flat weight if possible.
11. Prepare each of the 6 hat wedges by bending
forward at the lower brim perforation line, and
back at the upper crown perforation line, and also
bend the side edge tabs back.
segments of each, overlapping the straight side edge
(on the left edge of the RIGHT shape) over the corresponding
tab to perforation line (on the right edge of the LEFT shape),
and glue in place.
15. Bend and adjust the upper segments to join the seam
in a similar manner, and then the brim seam (lower segment)
in the same manner to complete the three-part seam.
16. Continue to add the next wedge to line up
middle, upper and lower segments in the same manner
until all six are joined. Finally, for the assembly into a ring
to line up and join the final edges in a seam.
a stack, taking care to line up the edges as precisely
as possible. Press under a weight until dry.
front accent panel, then . . .
. . . on the backside bend the tabs toward the outer edge

26. Position the front accent ring/hat assembly over
the card front panel, adjust so 'reveal' is even all
around, and attach in place.
27. Complete the "embellishments" for the hat,
including assembling the fly shown here (wings, head onto
body base), lure overlay onto hook base.
Open and position the center front edge at the top
edge of the 'stop' to open into easel stand.
A card base (two joined circles)
B front panel whole circle
C back panel whole circle
E interior upper accent
F interior lower accenty
G banner two layers with "gone fishin'" word cut
and fish
H stop panel (2)
I card front accent (fish cutouts disc)
J hat attachment flange
K hat wedges (6) L hat top hexagon
M hat button (circles to layer for build up 7-8)
N hat band shapes (6) O hat rim shapes (6)
P fly base, head and wings
Q lure base and body R hooks (1 left, 1 right)
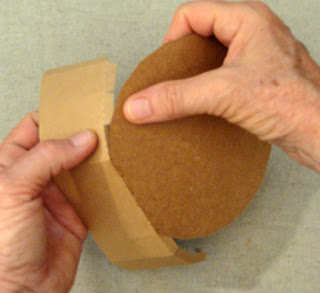
2. Prepare the card base by bending forward at
the center short perforation line and at the top panel
halfway perforation line.
3. Position the front whole circle panel over the front
portion of the base, align the edges that should line up
and attach only to the lower half.
This is the "mechanism" that allows the card to fold
into the 'easel' configuration.
4. Position and attach the backside whole circle
reinforcement to the underside of the card base.
5. Open the card base then position and attach
the upper half circle offset accent (align top edge
at perforation line) and the lower whole circle offset
accent.
6. Position and attach the layers of the 'stop' panelto provide enough 'lip' to catch the front easel panel edge.
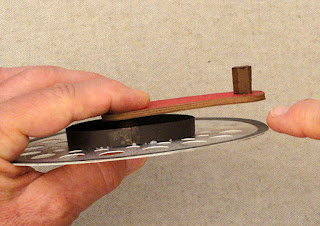
NOTE that when layering and gluing up shapes using
liquid adhesive, it will be helpful to press the assembly
under a heavy flat weight such as this fabric covered
repurposed weight machine bar, until the stack is
fully dried, to prevent warping or curling.
7. Position and attach the offset banner onto
the front of the banner base.
8. Position the banner assembly along the top ofthe 'stop' panel where the edges of each should line up,
and attach. Press under a flat weight if possible.
9. Position and attach the 'gone fishin' word phrase
on the banner, and the fish shape below.
10. Position the 'stop' panel assembly onto the bottom edge
of the interior accent panel, and attach in place.
Audition how the easel mechanism will work.11. Prepare each of the 6 hat wedges by bending
forward at the lower brim perforation line, and
back at the upper crown perforation line, and also
bend the side edge tabs back.
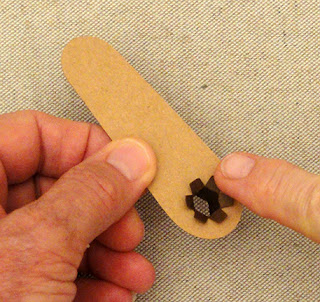
12. Position and attach the hat band strips onto
each prepared wedge, aligning holes and squaring
up the perforation lines and edges. Insert and attach
the eyelet accents at this time, if desired.
14. Position the first two wedges to line up the middlesegments of each, overlapping the straight side edge
(on the left edge of the RIGHT shape) over the corresponding
tab to perforation line (on the right edge of the LEFT shape),
and glue in place.
15. Bend and adjust the upper segments to join the seam
in a similar manner, and then the brim seam (lower segment)
in the same manner to complete the three-part seam.
16. Continue to add the next wedge to line up
middle, upper and lower segments in the same manner
until all six are joined. Finally, for the assembly into a ring
to line up and join the final edges in a seam.
17. Prepare the hat top panel by bending the outer
edge flanges forward.
18. Position and attach each of the button discs ina stack, taking care to line up the edges as precisely
as possible. Press under a weight until dry.
19. Position and attach the button over the center punch
hole of the hat's top panel.
20. Prepare the hat attachment flange by bending
the bottom edge tabs forward and the upper flanges
back.
21. Form the shape into a ring to overlap the straight
side edge over the opposite tab to perforation line,
and join seam.
22. Bend each upper edge flange back and
glue to the ring backside.
23. Insert lower tabs into the slots of the card'sfront accent panel, then . . .
. . . on the backside bend the tabs toward the outer edge
and glue to the underside of the accent panel.
24. Position the hat wedges assembly over the attachment
flange so that the each wedge is centered over
a flat face of the attachment ring. Apply glue where
the hat and ring surfaces will touch, then slide hat ring
down until the brim rests on the accent circle's surface.
25. Position the hat top panel over the opening,
adjust so that the shapes correspond, then insert
and push into place slightly so that the flange top
edges align with the wedge top edges exactly,
and pinch together all around to attach in place.

26. Position the front accent ring/hat assembly over
the card front panel, adjust so 'reveal' is even all
around, and attach in place.
27. Complete the "embellishments" for the hat,
including assembling the fly shown here (wings, head onto
body base), lure overlay onto hook base.
28. Position and attach to the hat wedges as desired.
Here is the finished sample project, closed.Open and position the center front edge at the top
edge of the 'stop' to open into easel stand.
Consider assembling the custom fit-to-size reel box
project as the gift box for the fishing hat easel card.
Here are the card and box projects shown together.


