
Large size gift box holds approx. 16 oz. of cookies or
bulkier loose candy or goodies.

loose candy and the like.

Both have very similar features and assembly.
Large box is constructed of two large panels that are joined.
Medium box has a "welded" panel.
Each has a front rounded-edge window,
clear window panel,
latch bottom, gable top side panels,
double wing and
slot top closure,
offset accent overlay panels for front and back hull.
Cut the hull shapes from 12x12 card stock.
The large tote will be explained first, with brief
descriptions of differences for medium tote following.
ASSEMBLY: 1. Identify and cut the shapes for large tote:
A front tote hull B back tote hull
C clear vinyl window panel
D front accent offset panel
E back accent offset panel
F side accent offset panels (2)
G optional circle seal
H optional cutout from window of D (for gift tag)

2. Prepare the hull shapes by bending back on l panel
and tab perforation lines (except for angled top lines), including . . .


and on angled seams bend forward, as "mountain" folds.
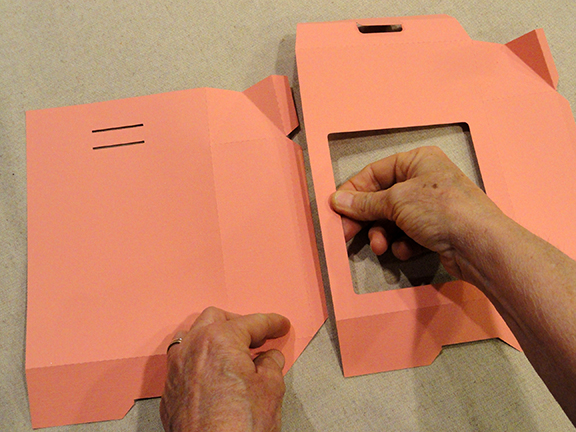
 3. Join the front and back hull panels along one side seam,

taking care to overlap straight side edge across opposite
flange, adjusting to make sure bottom panel perforations
align.
 4. Position and attach the offset accent panels to
back, sides and front, centering and checking
that outer edges are offset approx. .12" inward.
NOTE that window cutout of accent should align
exactly with hull window cutout edges.


5. Apply double-stick tape next to window cutout,
then position (centered) over backside of
front hull panel window cutout, and attach in place.

6. Form the hull assembly into a tube to bring remaining
side seam straight edge to overlay opposite flange,
and join side seam.

so that fingertip pressure can be applied along seam.

7. Apply adhesive (double-stick tape shown here) to
the underside of each bottom latch long panel extension,
and onto face surface of side flaps, then . . .

. . . bend side flaps inward to perpendicular . . .

. . . fold long flaps inward so that they interlock
as shown, then apply pressure to join bottom sections.

If needed, reach inside to apply pressure to attach.

8. To close the container, fold the back top section
inward, then fold the front top section inward, with
top/outer flap bending downward so that the tab can fit
into the bottom slot, and . . .

. . . the cut-in tab can bend down into the top slot.

NOTE that it will be helpful to assist the top portions
of front and back hull panels to "curl" slightly inward
where they need to conform to the gable shaping.

10. To use the "waste" portion of the front accent panel,
folded in half, then . . .

. . . paper punched to attach with ribbon or string
to hull (use cello tape, decorative sticker or seal,
or punch a hole near angled walls of one front gable.

11. If desired, once tote is filled and latch tabs
inserted into slots, secure with decorative sticker seal.

Here is the completed large tote from back view.

MEDIUM TOTE ASSEMBLY
11. Identify and cut the shapes:
A one-piece front & back hull
B clear window panel
C front accent shape D front window accent rim
E back accent shape F side accent shape (2)
G optional closure seam
H optional retained waste panel from D as gift card

accent shape is attached to front hull, as shown below),
5-11 for large tote).


No comments:
Post a Comment