Showing posts with label Joseph. Show all posts

Friday, December 19, 2014

Nativity Scene Box Card Construction Guide

Create this miniature and dimensional
nativity scene as a card that can fold flat to send,
then "pop out" to use as a seasonal decoration.
Three bridges place the manger with baby Jesus,
Mary, and Joseph at different depths
for a realistic perspective.
Post and rail partitions decorate the side flaps,
straw or hay spills from the top of the front flap
with delicate "O Holy Night" letter cutout.
Back panel is a see-thru stable with star and star burst.

Cut file is (soon) available from
SnapDragonSnippets.com, 
and Silhouette America's online store.

ASSEMBLY:
1. Identify and cut the shapes:
A box card base
B front accent panels in position
C back section overlay (cut 2 sets, optional)
D stable roof with star and burst layers
E front flap overlay with O Holy Night cutout
F side flap overlays with rails
G hay assembly with base and pieces
H Baby Jesus figure with bridge strip
I May figure with bridge strip
J Josph figure with bridge strip


2. Position and attach front box accent panels, and optional backside stable overlay with roof.


3. Assemble the hay unit. NOTE that this sample has the BASE hay shape cut from color 1 darkest tan, four spikes from color 2 second darkest tan, three spikes cut from color 3 deep yellow, and two spikes cut from color 4 yellow. 

You may choose to use more colors.


Here you can see the final assembly. NOTE that some of the base shape (color 1) is still exposed.


4. Layer the side flap accent rail/post base shape with rails on top. Position these over the side flaps offset within the shaped edges of the flaps. Assemble the plaque shape with hay extended beyond perf line, and word cutouts on the card front flap.

NOTE that these shape assemblies are being attached to the backside of the card base, since the front side was where the shapes were attached in step 2 above.

5. Layer the star beam base and accent shape offset centered over the top.

6. Position the beam assembly behind the top of the back flap (stable and roof are the front, as well as being on the inside of the finished box). Glue in place.


7. Position and attach the layered star assembly over the front of the stable roof.


8. Form the box base (with all its assembly) into a tube to bring the side edge and flange tab perforation line together, apply glue to the tab, overlap straight edge to tab line and apply pressure until the seam is secure.


9. Fold bridge strip end tabs back. 

Assemble the figures over their base shapes. NOTE that Joseph's staff will be layered UNDER the robe, sleeve and hand.

10. Position and attach figures on their bridge strips, overlapping approx. 1/4" of lower figure edge at strip top. JOSEPH: left as far as possible, front of strip. MARY: right as far as possible behind strip. BABY JESUS: centered, with exposed base margin behind strip (manger lower edge will abut at strip edge).


11. OPTIONAL: for better visibility, consider careful inking of eye cutouts. Use fine stylus or push pin tip "dipped" into pen ink for baby.


12. With end tabs back, apply glue to tabs, then insert Mary bridge into box interior and CENTER it front-to-back. Press tabs to attach in place to box interior sides, and apply pressure to secure.

BEFORE glue is completely cured . . .


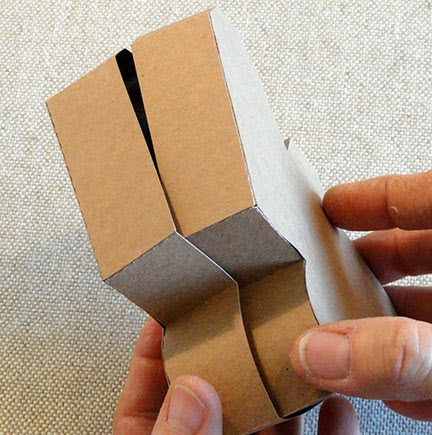
. . . fold the box assembly into its FLATTENED position and apply pressure in the area where the tabs are joined behind layers.

This allows the bridge ends to adjust a bit so that the card will be able to be flattened to send.

(Repeat this folding flat/adjustment step as each bridge is positioned and joined.)


13. Position the Baby Jesus bridge assembly half way in the space forward of the Mary bridge, following the same procedure as in step 12 above.

14. Position the Joseph bridge assembly  half way in the space behind the Mary bridge following the same procedures as in step 12.


Here is the card folded into its flattened position ready to insert into a sized-right envelope.


Here is the completed box card opened.


Wednesday, December 4, 2013

Nativity 3D Box Tutorials: Baby Jesus, Mary, Joseph


Now available:
 cut file designs of 3d nativity boxes.
These three range in size from 2 5/8" to 7 1/4" tall.
They may look like they are constructed from wood blocks
but they are BASE-AND-LID boxes made of card stock.
Though there are several steps in the process,
they are not difficult to construct.
Make them yourself, or let your little people help you,
then talk about the reasons we celebrate Christmas.

Construction for all three boxes will be demonstrated here.
Scroll to find steps and photos for Mary or Joseph as you need.


BABY JESUS IN MANGER
1. Identify and cut the pieces. Note that the boxing shapes for the LID (top, right) and BASE have tiny symbols cut into the end tabs or top tabs nearest the end to help match them in perimeter order. Also note that the manger darkest brown piece will be layered UNDER the front medium brown piece so that the nail holes will show through as contrast.

NOTE the Baby base shape between the blanket and trim shapes and the other baby components. This is used to assemble the smaller pieces accurately. You may also wish to accent the half-circle "eye" cut by running a thick needle tip loaded with distressing ink or similar along the cut. A pinky end dipped in makeup blush adds color to cheeks of all three box designs.

2. Begin with the LID shape. Fold the boxing strips on perforations: side tabs inward; fold end tabs and side perfs to match the "mountain" or "valley" folds of the corresponding corners of the LID face shape.


 3. Before gluing, shape the side section of the boxing outward slightly by curling it slightly over a finger or thumb as shown. This is more easily accomplished BEFORE the tabs are folded, or just re-straighten them for the curling step.
4.  Apply glue and join the first seam to the LID. 

5. Continue joining segments in order. For the curved section, align the ends, then flex and work the boxing edge to match the curve of the lid face shape. While glue is pliable, continue to make adjustments as necessary for an accurate, smooth joint.


6.  Join the end tab to the first boxing end.


7. Continue the sections edge-joining process until all three boxing strips are joined and in place. This image shows the final end-to-end tab gluing process. Because the space is tight in this corner, take time and use fingers or other sharper-edge tools like a ruler or pencil to be able to apply pressure against the ridge and side end for an accurate and neat joint.

Repeat the assembly for the BASE.


8. Assemble the design shapes separately, then glue to the face of the LID, keeping the "echo" margin between shape edges and box face edges.

Fit base into backside of lid to complete the box. Insert a small packet of doll weight pellets or similar material, if desired, before closing box. Glue layers together (see Mary tutorial for these steps for that box). 


MARY TUTORIAL
9. Identify and cut the shapes. 

Note that this image shows the design foundation shape (bottom left) upon which  the colored pieces will be assembled.


10. Fold the boxing shapes on perforations: side tabs inward, other end tabs inward, shape sections to match the corners of the LID shape.


11. Shape the curved sections by "curling" them slightly over finger or thumb so that they imitate the lid curves that correspond.

(NOTE that Mary's curves are inward curls while the manger edges are outward curls.


12. Align and attach the first section of the boxing strip you begin with. Here the left side, second segment above the curve is being joined first. This is one choice for a starting place. It may be helpful to have the section beyond the curve in place before the curved section is attached so that the curve can be flexed against that secured edge for better fitting during gluing.


13. Next, glue the curve. Align the opposite end (or both ends if construction order different that what is described in step 12) and glue, then while glue is still pliable flex and glue the curve section in between to match and fit the LID edge accurately.
14.  Continue joining segments in order. Attach the next boxing strip end tab to edge of first strip as construction progresses. 

Complete boxing strip joining.


 15. Assemble design shapes onto their component base shapes, then onto the foundation shape. Note that the eye and veil/headdress contrast is provided by the foundation shape.


16. Glue the design shape, centered, onto the LID. Once glued and positioned on the face, it may be helpful to turn the LID over on a smooth hard surface and apply finger pressure from the backside, as shown here. This may assist the edges to attach more smoothly.


17. Fit the base inside the lid. 
18. If desired, before closing box, prepare and insert a small baggie of doll weight pellets.


Glue the baggie in place, if you have concern about movement within the box.


As an optional step, apply glue between the LID and BASE edges. This way, the box will function more like a wood block figure.

JOSEPH TUTORIAL
19. Identify and cut the shapes. (Missing from this layout is the dark brown staff)


20. Fold the boxing strips on perforations, tabs inward, other folds to match the LID shape.


21. Position and attach the first edge of boxing strip to LID. Continue attaching edges, joining boxing strip ends, etc., to complete the LID.


22. Assemble the design shapes on their base shape or component shapes until completely assembled.

Attach design shape to LID face.


23. Complete BASE in similar fashion. Add weight pellet baggie, if desired, then fit base into lid backside.  Apply glue between the lid and base edges (see illustration at the end of Step 18) if desired.


Enjoy your completed three-figure project!