
Create
and give this unique gift tag that can become
a decorative ornament for tree or
wreath.
Classic shaped rectangle tag with top header, ribbon slot
and oval
reinforcement at top, features doubled stitching front layer,
with opt.
stitching buffer layer, solid back.
Measures approx. 2” wide x 3.125” tall when
finished.
ASSEMBLY: 1. Identify and cut the shapes:
A stitching layer (2 to layer and glue together for rigidity)
B stitching buffer layer C whole back layer
D header accent (1 ea. for front and back)
E slot ring reinforcement (1 ea. for front and back)

2. Prepare the stitching hole-punched layers by using
a tool such as this un-bent standard paper clip to poke
through the holes to remove any punch "crumbs"
that may still be hanging on.

Also use a straight pin to punch through the tiny
eye knot stitch holes.

3. Layer the two stitching layers and glue together,
taking care to line up all cut edges as precisely
as possible, both outer edges and all punched holes.
NOTE that it may be helpful to use the paperclip tool
inserted in edge holes to help adjust the layers
for best alignment.

4. Immediately after glue-up, place the stitching layers
on a flat surface, with a flat heavy weight on top
to press during the drying process, which may
take up to several hours or overnight.
This helps the shape stay flat, and avoid warping
or curling because of the liquid adhesive.

5. Assemble the stitching materials and tools:
floss for face, beard, nose, hat, fur, eyes;
24/26 tapestry needles.

6. Prepare to stitch by cutting a length of 6-ply floss
approx. 30-36" long (shorter for smaller areas),
and separating TWO of the plies.

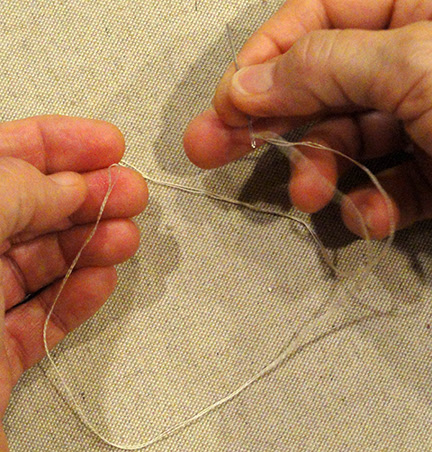
7. A) Line up the ends of both plies and straighten
the plies so that they are without twists.

B) Fold the two plies to line up the four ends, then
fold in half to create a half-way loop.
Thread the loop through the needle's eye, then . . .

. . . pull the loop through, leaving approx. 5-6" cut ends tail.
The loop becomes the long "end".
8. Review the following diagram to fully understand
how the cross stitches are formed uniformly
with RIGHT SLANT stitches made across the row first,
then the return half of the run completing
the LEFT SLANT stitches.


9. Refer to the Stitching Chart, either on screen,
or printed, to locate the bottom-most beard cross stitch.
This is where the first stitch will be made,
afterward working upward through the design.
10. Visualize the 'X' of the first stitch, then insert the needle
UP from backside through the top left hole of the bottom FOUR
that will create the 'X". Pull needle and thread through
leaving approx. 3-4" of loop "tail" still on backside.
11. Insert the needle into the bottom right hole,
then pass the needle through the loop, and cinch
the thread up firmly on the back. This is the "tie on" step.

12. Complete the bottom/first cross stitch to create
the bottom 'X'.
13. Move up to the second row to complete
the RIGHT SLANT stitches across, then return
back across to complete the LEFT SLANT stitches.

14. Continue to move up to next row after each row
is completed. As stitching reaches across 6th row,
stop at the end of the row and work the right side of
the beard upward, then back down, then complete
the LEFT SLANT stitches to return across the row.

15. (Shown with a different project)
When thread is used up, or at the end of a section,
on the backside slide the needle UNDER a few stitches . . .

. . . pull the thread through to taut, then trim the excess
even with the project surface.

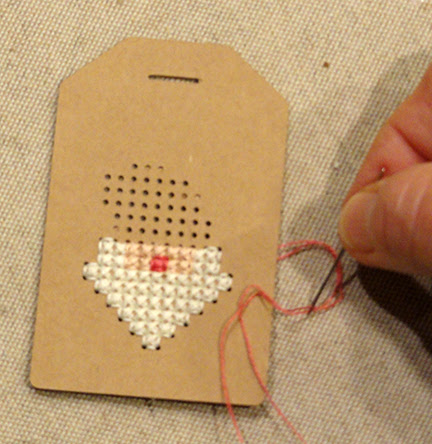
16. When the beard area stitching is completed
and tied off, thread up a single ply - two ends through
needle - and outline the beard area with alternating
straight and back stitches, then tie off.
17. Complete the face in similar fashion, using
doubled 2-plies (four threads through needle).
18. For the nose, thread 1 ply ends (two threads)
through needle, tie on, then complete TWO right slant
stitches in the nose position, then complete TWO left
slant stitches to create the 'X'. DON'T tie off: instead,
complete straight/back stitches around the nose,
then carry thread to backside and tie off in the usual way.
19. Complete the fur row and tassel stitches
as 4-ply stitches, then outline tassel all around,
fur ends only with 2-ply back or straight stitches.
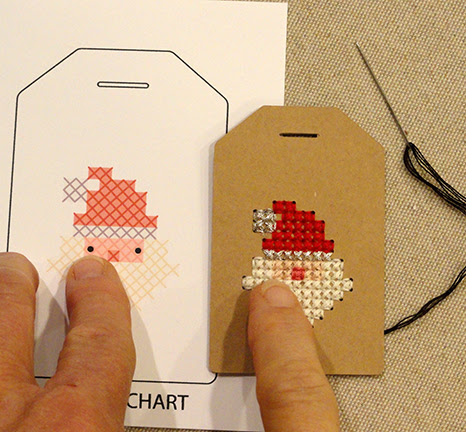
20. Complete hat area stitches, with 4-ply
cross stitches, and 2-ply outline stitches.
Here is the completed stitched tag.

20. Locate once again the position of
the tiny holes for the colonial knot eyes.
21. Study the following diagram for creating the colonial
knot (considered easier to achieve consistent knots
than french knot stitch).

A) Thread needle with doubled two-ply loop, then
"tie on" by passing needle under ONE stitch on backside
of tag near where the first eye will be added.
Pull through to leave a small loop.

B) Pass needle through loop and pull up tight.
C) Insert needle through tiny eye stitch hole from
backside.

D) On front side, form the Figure 8 with thread, then . . .

. . . with needle capturing the '8' on shaft,
carefully move the needle to re-insert the tip
into the same tiny hole, while holding the thread
length taut.

E) Pull thread through as tight knot is allowed
to form at surface of stitching, until no excess
remains on top side. DON'T pull too tightly
to make the knot too small: aim for consistent
size between the two eye knots.
F) Pass the needle along backside to insert
needle through the second tiny eye hole
and repeat the colonial knot.
G) Tie off on the backside in the usual manner.

22. Position and attach the buffer layer on backside
of stitching panel.

23. Position and attach the back panel onto backside
of the stitching panel.

24. Position and attach the header and reinforcement
ring onto front and back of tag.
Place assembly under a flat weight until
thoroughly dried.

25. Add a length of ribbon through slot,
tied with coordinated twine.
Here is the finished sample tag.

No comments:
Post a Comment