
printed paper. Perforations define the pleats to create
the accordion fan-folds
of this lantern-shaped ornament
for holiday or seasonal decor. Bend, crease,
and shape
three panels; join end seams, then use a tapestry blunt end
needle to thread no. 5 perle cotton thread/yarn
(or equivalent gauge soft twine or beading wire)
through the tiny holes to gather the ends.
Insert
prepared tassel or other “dangles” plus ribbon
or cord loop before cinching up
the top and bottom and tying off.
Measures approx 4.25” tall x 3.75” diameter
when completed
(separate from tassel and loop, etc.).
Additional embellishments
can include wooden
or glass beads, metal bead end cups, etc.
ASSEMBLY: 1. Cut the card stock paper shapes
for this design: 3 pleat panels

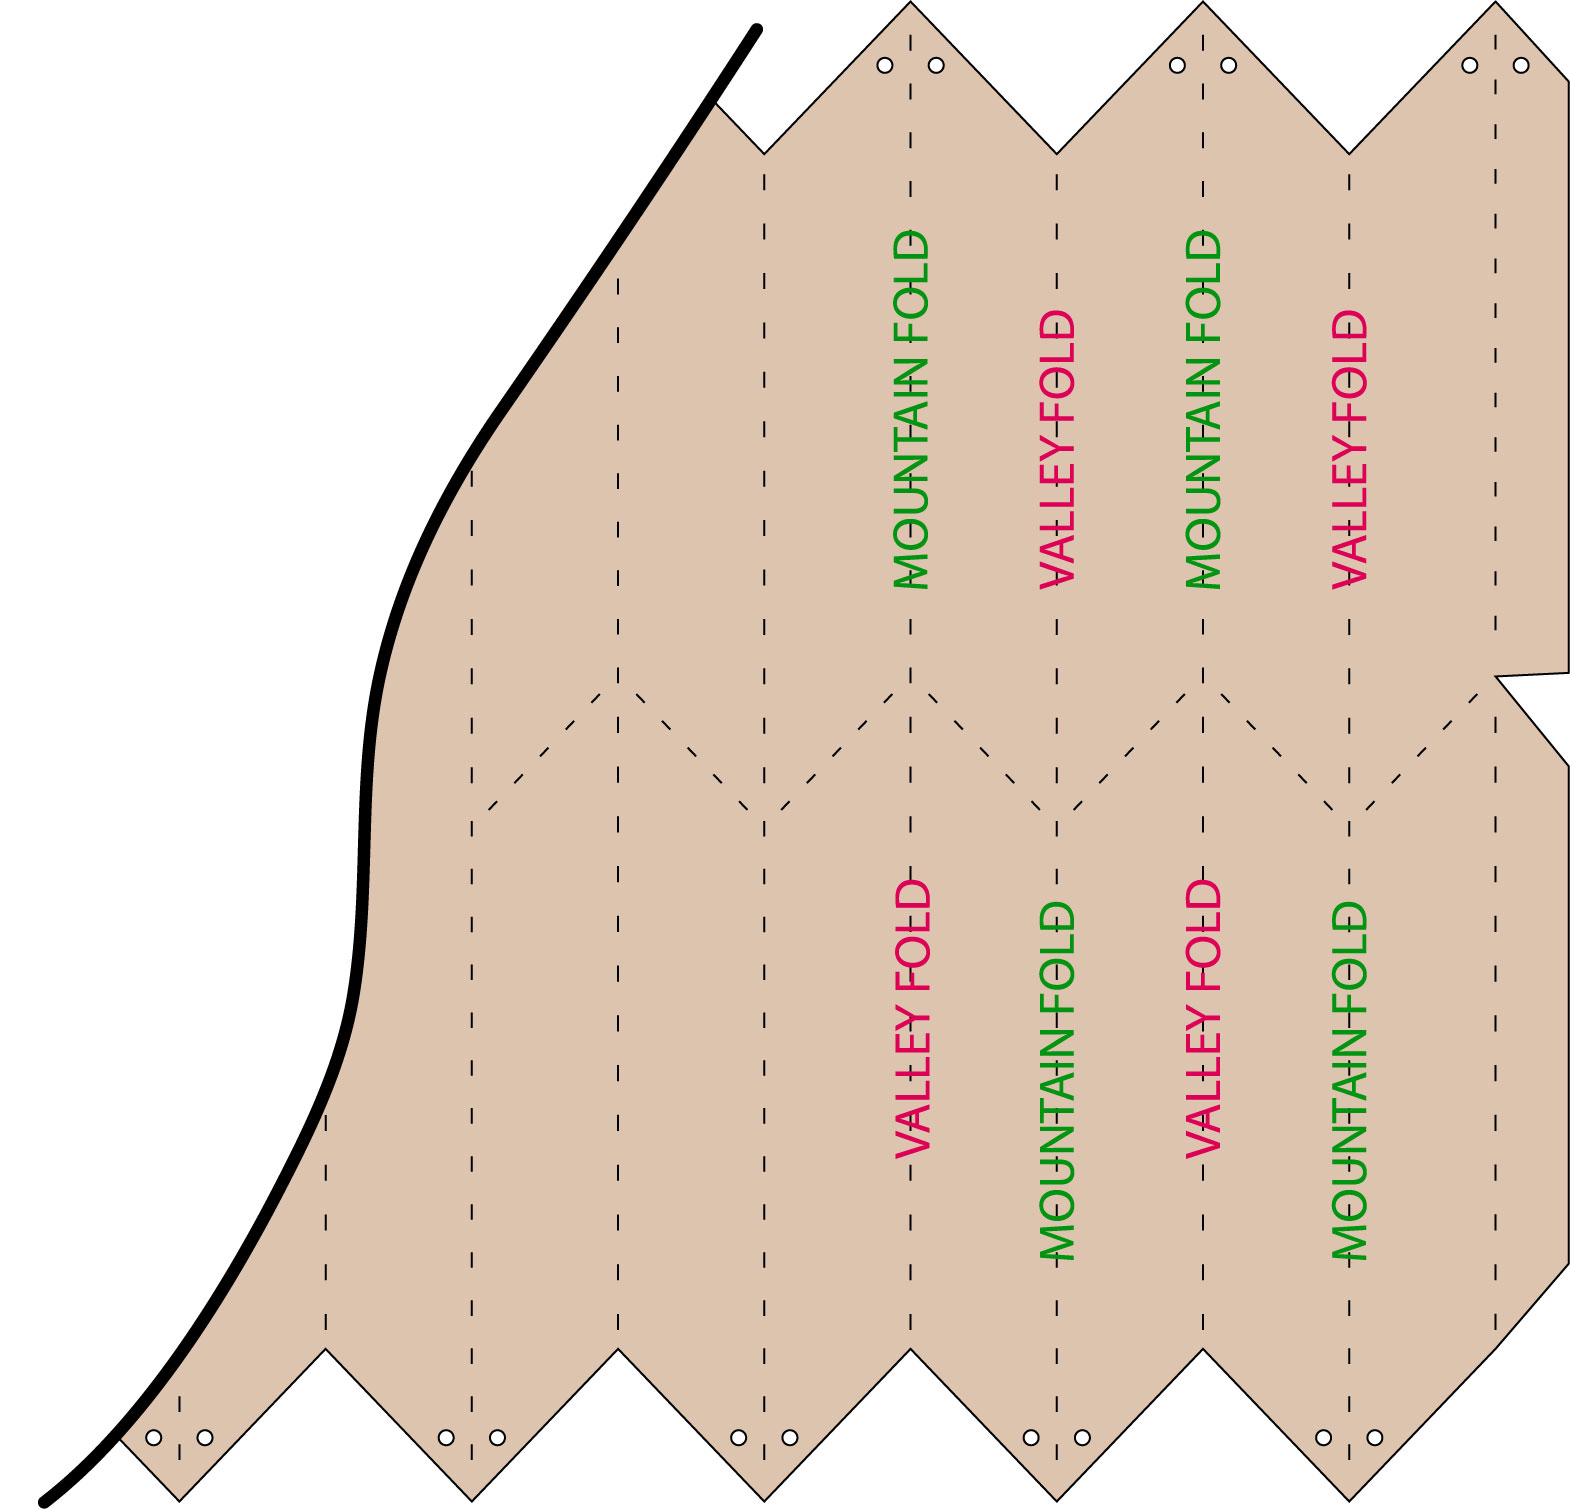
2. Begin by bending the tab end perforations as
"valley" folds, then continue in alternating manner
to fold along all vertical perforations, "mountain",
then "valley", and so forth.


between the top "half" and the bottom, begin again
at the tab end and re-fold in the opposite direction,
across the width of the panels.
(This image below is shown before the re-folding.)

line as "mountain" fold between the vertical
perforation lines, ONLY . . .

DO extend completely to the intersections.

5. Begin the pleating process at tab end, working
the long perforation line segments to that the VALLEY
folds are the tallest lines, and the MOUNTAIN folds
are the shortest lines. This will force the re-direction
of the vertical perforation lines at the zigzag lines
(which all remain as MOUNTAIN creases).

This illustration, below, shows that the VALLEY folds
extend to the inward side of the angled zigzag creases,
creating the pointing arrows, while the MOUNTAIN folds
are what the arrows are pointing at after a fashion.
This picture may also help to show where the first VALLEY
fold is, and then . . .


on each side of the zigzag center, assisting the re-directing
of the folds and the pleating proceeds.


this inverted 'V' shape), and apply fingertip pressure
to assist all the pleats to extend at the intersections.

end to end to align the tabs end with the straight plain
side edges, opposite, then overlap the straight edge
over tabs to foldline, adjust for alignment,
then glue each half in place.

9. Form the panel assembly into a tube to align
adjust and glue the final side seam.
(NOTE if it is easier to work with, the final seam can
be left unglued until after the gather stitching is in place,
as was shown with the Large Sphere ornament, HERE -
refer to steps 9 & 10.)

pass easily through the threading holes with a 36" length
of no.5 perle cotton or equivalent gauge soft twine . . .


"down" through the hole on right side of pleat
and "up" through the hole on the left side of pleat.
Continue in the same manner around the circuit,
ending after the last empty stitching hole has been
threaded on. Leave a tail and trim away from yarn
that remains in the needle at about the halfway point,
or around 18" left; tie a stop knot at end of first circuit
(to prevent un-stitching).
12. Tie new end stop know, then repeat the stitching
through holes along the opposite edge.

or hook, if and as desired, and pass it through center
of the ornament tube.

pleating as tightly as possible, then secure with second
overhand know (to create a square or granny knot).
Trim to leave short tails, then tuck into the interior.
15. Repeat step 14 for the top end. Apply glue to
secure that the beads attach to the bicone and hide
the gathers circle opening, as desired.

Here is the completed ornament.

No comments:
Post a Comment