
Dimensional,
small-scale treat box has perforations
to bend lower hull walls to create
container for
fun July 4th or other occasion gifting.
(Enlargeable to fit specific
needs.)

Square “on point” bottom is closed with bend-n-latch flaps.
At top,
header panel holds two punch holes
for twine or ribbon tied closure.
Straight
band and sawtooth bands embellish front
atop three half circle “doily” style
bunting shapes.
Measures approx. 4.7” tall x 3.625” wide at top
x 2.25” square deep.
ASSEMBLY: 1. Identify and cut the shapes:
A tote hull (this shape has been modified slightly)
B front (and optional back) offset accent panels
C-E half circle doily accents
F plain and sawtooth accent strips

for panels, side flange tab, bottom latch tabs;
bend forward on top header panel perforation lines.
 3. Position and attach the offset accent panels within

the hull panels as defined by perforation lines.
NOTE: if desired, cut a second set of accent panels
for the back of the tote.


4. Bend the header flanges of all three doily shapes
forward slightly. Center side to side, with top edges
matched and punch holes aligned, then attach
the three layers at top flange and lightly behind
overlaid doilies.

5. Position and attach the plain accent strip on top
of the sawtooth strip, with bottom and side edges
aligned. Position and attach strips assembly at
doily assembly header, above perforation line.

7. Fold the hull in half, bend the side flange inward,
then glue the side seam.
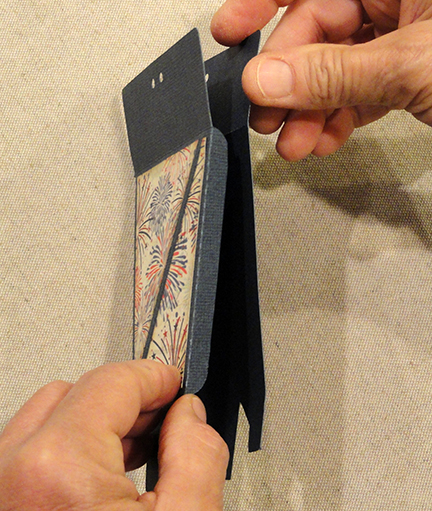
NOTE that the hull can be laid flat with fingertip
pressure applied along the side edge to help
secure the seam.

8. Squash the hull by pressing the side folds inward
to open up the interior as the hull bends on diagonal folds.

9. Close the bottom by bending A) square "slot" flap
inward . . .

. . . B) both side flaps inward . . .

. . . C) then tab flap inward, pressing down on all
to allow tab tongue to slip into the slot created.

Finally, allow the bottom tabs to relax into perpendicular
formation (this may be assisted by pushing with a tool
such as a pencil end from inside). If desired, apply
glue to secure the flaps in position. Otherwise,
the hull can be "disassembled" and flattened
for storage and use at a later time.

10. Position (centered) the doily assembly with
bend and perforations aligned . . .

. . . and attach.

11. Open top panels, fill tote, then close.
Thread ribbon length through top holes
and tie knot and bow.

Here is a side view of completed tote.

No comments:
Post a Comment