
Add display impact to an artistic card with this
decorative wall plaque
(card artwork NOT included in the design cut file)
which functions as a mat frame for “portrait” oriented
greeting card art. Plaque is made thick by layering
cut out shapes for
thickness that imitates plywood.
Components include exaggerated teardrop
flourish
cutout shapes, top shape with a hanger or ribbon punch hole.
Overlaid
shaped-edge frame includes with circle cutouts
sized to receive .5” painted
wooden mushroom “button” plugs
as accents (shapes also included with holes
omitted).

Card “reveal” shapes include smaller opening measuring
approx. 6.625”
wide x 4.5” tall.
Landscape plaque measures
approx. 9.25” wide x 17.5” tall.
Portrait plaque measures
approx. 9.25” wide x 17.5” tall.
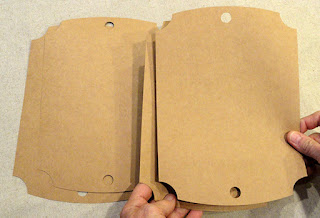
ASSEMBLY: 1. Identify and cut the shapes:
A front plaque base shapes (3-4 for thickness build up)
B contrast mat frame (exposed narrow border)
C front mat frame
D top plaque extension (3-4 layers plus face layer)
E bottom plaque extension (3-4 layers plus face layer)
F artwork to be framed ("JOY" floral card from Halmark
Cards is used for the sample project)
G wooden 1/2" mushroom plugs (optional variation included)

taking care here and throughout when layering that
ALL cut edges are aligned as precisely as possible.
Immediately place on a heavy flat surface with heavy flat
weights positioned on top of glued-up stack, as shown.
Immediately place on a heavy flat surface with heavy flat
weights positioned on top of glued-up stack, as shown.
If using a heavy book, consider placing somethings else
heavy on top of book to press as firmly as possible to
help prevent warping and curling, allowing glue to dry
for several hours or overnight.

(bright green in sample) and top frame layer with
outer edges aligned as precisely as possible.
Press under a heavy flat object until thoroughly dry.

 6. Position the dried mat assembly over the selected
4. Layer and attach the upper plaque extension layers
into a stack - with face layer on front - matching all cut
edges precisely. Press under heavy weights until dry.
5. Repeat step 4 for the lower plaque extension layers.
artwork to be displayed, centering so that an even
narrow margin remains unexposed at edges, so that
it can be temporarily taped in place, if preferred, or
glued more permanently in place.

of main plaque shapes, align cut edges, and attach.
Press under heavy flat weight as before.
 8. Place the dried upper and lower extension assemblies
together on work surface with straight inward edges
aligned and abutted.
9. Position the main front plaque assembly over
the top, and position upper and lower edges
at the corner transition points as indicated with
pointing finger . . .
 . . . so that the main plaque is centered side
to side at indicated points, as shown.
Glue in place with strong glue such as Fabri-Tack.
 10. Position and attach painted or stained
mushroom buttons (if using that variation).
 11. Attach decorative ribbon hanger loop
or bow, as desired, then hang from peg or nail.

No comments:
Post a Comment