
Classic
step configured base has side panels that bend back
into a "supporting role" somewhat behind main panel.
At center, crossing candy canes cameo on a
swirl-edge circle
with holly and berries cluster at intersection.

Side, bottom
and back accent panels are decorated
with eyelet style lace strips, with
two-layer simple plaque
at center bottom that can hold a penned or stamped sentiment.
Card measures approx. 5.875” tall x 7” wide
when folded flat.

Companion
envelope design is also available
as enclosure for giving:
“Env Candy Cane Flap for Step Card”
ASSEMBLY: 1. Identify and cut the shapes:
A card base with step fold perforations
B front center panel offset accent panel
C front side accent strips with eyelet lace strips
D front bottom accent strips with eyelet lace strip
E optional back offset panel with eyelet lace strips
F front sentiment panel with offset accent panel
G front accent disc H loopy edge front disc base
I single candy cane base with stripes overlay
J crossed cane base with single cane stripes overlay
K holly leaves & berries cluster shapes:
base silhouette, whole and half leaves,
berries with contrast berry underlays

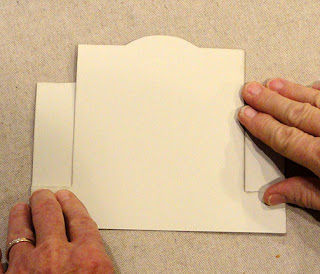
2. Crease the perforations of card base in a preliminary
manner, allowing the circle disc shaped cut at top
to pop free. Base perforations are ALL folded as
"mountain" folds, except bend the side panels second
from bottom edge as "valley" folds. NOTE that
the cut file has small 'V' symbols next to these perf lines.

Bend back all the folds while assisting the valley folds
to bend into position, directing the card to arrange itself
into front and back panel halves. Then . . .

. . . apply pressure to all perforations to
lock the base panel into its final closed form.
3. Prepare the accent offset panels by adding
corresponding lace strips a narrow margin margin
away from outer or bottom edges as shown.

4. Position and attach the front center panel in place
with narrow, even margin around sides and top edges
as shown.

5. Position and attach bottom strip assembly with narrow
offset margin all around. NOTE that this image shows
a rotated position from the designed positioning
and the final sample version (see next frame).

6. Position and attach side accent strip assemblies
with narrow offset margins.

7. Position and attach the back accent panel assembly
on back of card base with narrow offset margin
on all edges as shown.

9. Prepare the front circle disc assembly by centering
and attaching the main disc onto the loopy edge
accent shape.
10. Prepare the sentiment plaque by layering and
attaching the main (light) panel on top of
the larger panel.

12. Position and attach the corresponding "stripe"
candy cane shapes on top of the single shape
and the crossed base silhouette.

13. Position and attach the single cane assembly
over the corresponding portion of the base silhouette
shape, crossing on top of the other stripe overlay.

14. Prepare the holly and berries cluster by . . .
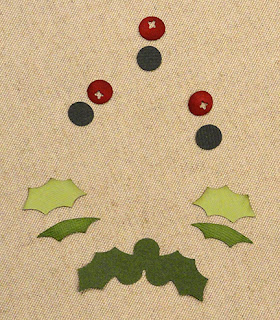
. . . positioning and attaching: the "red" berry fronts
on top of corresponding contrast base shapes;
half holly leaves on top of the whole leaves.

Finally, position and attach the whole leaf assemblies
onto the silhouette base, then placing and attaching
the lower and upper berries.

15. Position the front disc assembly by aligning
the center top portion of the solid circle edge of
loopy back layer with the circle cut edge of
card base, then . . .

. . . glue in place.

16. Position and attach the candy cane unit over
the center of the disc assembly, then position
and attach the berries cluster at canes intersection.

Here is the completed card.

No comments:
Post a Comment