Friday, January 11, 2013

"SNOW" 3d Letter Box Ensemble


I'm here to defy the folks who too quickly move from Christmas to Valentine's Day. 
I present this visual SHOUT OUT to say we have  "SNOW" , and it is worth celebrating!
These letters might look like they are made of wood,
but they are really built from card stock and printed paper.
The 3d letter boxes come from Snapdragon Snippets designs through Silhouette America. Other designs used here by the talented & imaginative Kenzie Daley include
the snow globe box, 3d snowman, 3d snow burst hanging inside the 'n' arch, 
and the glittery snowflake flourishes that decorate the 'S'.
 Three plus one reversed snowflake flourishes were cut from Silhouette's 
double-sided adhesive paper, hand-arranged over the accent S shape, 
then everything that extended beyond the shape's edge was trimmed away. 
Sticky areas were dowsed with fine blue glitter - such a thrilling "reveal" moment!. 
Two spongy pre-cut snowflake embellishments were added for dimension.

The limited edition lower case N provides the arch where the 3d snow burst shape can hang, sprayed with adhesive and blue-glittered, with a jewel drop attached on the bottom. 
The 3d skis are my own creation, drawn from a long rectangle and a medium length oval, overlapped and welded, then cut and glued-up 4 layers each. 
Tips were shaped as the layers were added and glued.
Dimensional snow globe box displays a friendly, slice-form snowman 
with added carrot nose triangle cutout and braided string scarf. 
Snowflake cutouts with jewel centers are clipped to a fine jute clothesline 
with tiny red-painted clothes pins.
Snowflake mittens with paper bow embellish the W. 
I created custom-designed cuffs with "ribbing" cutouts. 
A jumbo brad acts as virtual tying peg.

You may request a fact sheet that includes size modifications and other details 
by emailing Jodi at hearthsewnpatterns(at)yahoo(dot)com.


Shapes used:
Snapdragon Snippets: 3d letter box S, W (lower case 'n' can be purchased directly from Snapdragon Snippets' website), 3d snow burst, 3d snowglobe box, 3d snowman, snowflake flourish
Others:  mittens, "snowflake" thank you card (for the snowflake)


Four Winter Paper & Vinyl Projects


 Here are a few fun projects to consider for January crafting fun.


This "flourished snowflake square" from Snapdragon Snippets easily sizes up or down to fit on a white ceramic tile (purchase one-by-one at Lowe's or Home Depot, etc.). A great focal color spot, to go with a collection of stand-up snowmen or other seasonal decor.
 Use Silhouette designs to make snowmen out of at-hand products to give or keep. This idea came from an online resource, but these versions use cut paper pieces instead of printed wrapper sheet.

Snowman with shiny paper top hat is an emptied (and then re-filled with goodies, of course) Crystal Light plastic canister  Below, a pair of new knit gloves stretches over the top of a gourmet chocolate bar (Cadbury, Lindt, etc.). Surprising how the gloves morph into a wintry hat.

Shapes come from "3d snowman cannister wrap with hat" downloadable cut file available after 1-14-14 from SnapDragon Snippets and Silhouette America.


Ice on the front steps sometimes encroaches. A "gifted" blue pot seemed just the thing to make ice melt handy. Added white vinyl can clue-in those who notice the problem, kept just inside (or just outside) the front door.

Designs used were "you melt my heart" (with the 'you' part cut away to fit my pot), plus Snapdragon Snippets' "snowflake flourish".


My consignment-find snowman measuring stick was "planted" in a recycled planter bucket. Navy-blue vinyl provided the finishing touch, added just recently. The design is "winter wonderland" with side "flourishes".


If you have questions you think an email can answer, you are invited to email Jodi at hearthsewnpatterns(at)yahoo(dot)com.


Hope we've given you some warm-you-up inspiration!

Thursday, January 10, 2013

Winter Quilts Etc. Classes by Jodi Warner

If you live in the Sandy or Salt Lake City, Utah area
and have been hoping to enroll in a class to create your own
On the Docket month-by-month mini-banner quilt projects,
the first three of the series have been scheduled in the opening months of 2013
at Quilts, Etc., in Sandy, UT.
See their class listing and other details at
www.quilt-etc.com
and click on the "Classes" tab for the alphabetical class title listing.

MARCH On the Docket
February 16th, 10:30 a.m. - 1 p.m.


APRIL On the Docket
March 16th, 10:30 a.m. - 1 p.m.


One more class on the schedule:

Act Upon These Values
Young Women's Values Quilt
March 23 & 30, 10:30 am - 12:30 p.m.


Fabric Kit Chart for February On the Docket

The following image is a photograph chart
of the fabrics selected and included in the kit provided for sale by
Quilts, Etc., in Sandy, Utah,
prepared for class members and other customers
(January 2013).
If you are not able to see it clearly enough this way,
please email Jodi Warner at hearthsewnpatterns@yahoo.com
to request a return email with a scan attachment.
Carefully sort through your fabric kit, identify the fabrics and label your piece with a small sticky label or post-it note. Assemble into groups according to the panel or blocks.

"Act Upon These Values": Paper Pieced Triangle Units

 These steps demonstrate how to piece the triangle square units used for the colored "flower" blocks. 

Trim photocopies of the triangles foundation paper pattern a scant 1/8" BEYOND. Use rotary cutting equipment or scissors.

Cut fabric rectangles slightly larger than the trimmed paper rectangles. Cut one each BACKGROUND and COLOR rectangles. 

For this project, you will need 8 background and 1 each of the 8 value colors.


Layer the fabrics and foundation as shown (stacked with fabric edges aligned, paper within fabric rectangle edges):
bottom layer = color fabric FACE side up
second layer = background fabric Face down
top layer = paper rectangle, PRINT side up

Simply hold the layers together as you take the layered unit to the sewing machine, or use a couple of straight pins in the "open" areas away from the stitching/cutting lines.


Adjust machine stitching LENGTH to 8-10 stitches per inch, or about half the length of regular piecing and sewing.


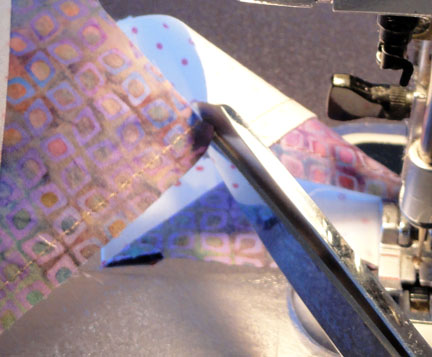
Stitch EXACTLY on the dashed stitching line, moving and rotating the layered unit at the end of the shown line to begin the next line section. Also stitch on the other dashed line, pivoting to redirect and complete the second half of the line.


TRIM: use rotary equipment to precisely trim on ALL solid "trim" lines, including the diagonal lines. Find a sequence for best efficiency to do this.

PRESS: place paper side of each unit on ironing surface, open the triangles, press colored triangle away from the seam.

REMOVE PAPER: fold along the stitching, then peel away seam allowance paper at stitching perforation; remove triangle, too.
Here you see the completed unit. Triangles of seam allowances (sometimes called "tails" or "ears") will extend beyond square raw edges. Trim these away even with raw edges.

Adjust stitching length back to normal. Complete piecing of blocks, using these units in designated positions. 

"Act Upon These Values": Piecing the Blocks


 To understand the block, lay out the pieces as shown, taking care to rotate the triangle square units so that the color corners "point" inward.
Position the short B and long C background strips between.

The first stitching steps will join the triangle square units to the B strips.

Separate the patches into two rows, with C between.


Fold a scrap of fabric (called a "Harry" because of all the clipped thread build up) to begin and end the piecing. 


Place an B strip FACE sides together over adjacent edge of triangle square unit. Stitch from one edge across to the other cut edge. Before stitching off, pause, then prepare and stitch across onto and across the next unit.
This is called chain piecing of CHAINING. It saves time, waste thread between, and bothersome lint.


When you have stitched stitched across the lasty unit seam in the sequence, reach to the beginning, clip off the Harry, then place and stitch onto it so that the patchwork units are safely beyond the needle.

Park the machine there with needle down.


Clip threads to separate the stitched units.


Press the B patch AWAY from the triangle square patch. 


Join the corresponding triangle square unit to complete the upper and lower rows. Press the B patch AWAY from the second triangle square patch.


Join one row to a long edge of C.

Press seam toward the C.

Join the other row to remaining side of C.

Press seam toward the C.


"Act Upon These Values": Embroidered Panel

These photos will help demonstrate the chain stitch used to embroider "act upon these" for the center panel.
1. Knot the single perle cotton or floss end (not doubled). Come up into the start position from the backside of the fabric.
2. Create a loop with the thread, then insert the needle point again into or very near the entry hole in the fabric.
3. Move needle to come up a scant 1/4" on the guideline forward from the insertion point. Allow the thread to loop around the needle on fabric surface to create the "chain".

This image is showing the second stitch being made.


Continue to create the chain stitches, following the temporary marked guideline. Take care to be consistent in the scant 1/4" length between the entry and exit points made by the needle.

At the end, instead of creating another stitch, the needle is inserted just over the top of the last chain stitch, so that the top of the loop will be captured by this final very short stitch.
 On the backside, tie off by sliding the needle and thread under an adjacent stitch to where the needle came to backside of work. Before the loop created is pulled "flat", pass the needle through the loop to create the anchoring knot. Weave the needle and thread back and forth through a few more stitches to create a tail beyond the knot. Clip the thread.