Simplify
a fun children’s Halloween activity with
cut shapes to transform a “giant” size
paper lunch sack into a not-so-scary hand puppet,
ready to help tell favorite
“spooky” jokes!
Designed for sack finished size approx. 6” wide x 4” deep x 9”
long;
shapes also included for smaller #5 sack size
approx. 5” wide x 3.125”
deep x 10” long.)
Shapes include chest base, wrap-over face panels,
with accent
shapes: spiky hair, eyebrows, round eyes and pupils,
head side bolts (double
these for extra strength),
mouth and teeth overlays, tunic with faux X
and tie
ends to overlay or thread through punch holes.
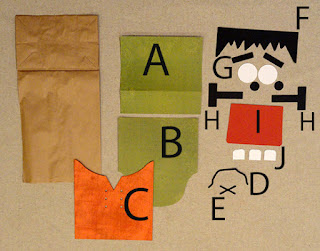
ASSEMBLY: 1. Identify and cut the shapes:
A head/underlap for upper mouth edge
B mouth/chest C tunic
D & E cord shapes for tunic: ends and 'X'
F hair G eye white, pupils, brows
H neck bolts (double these for strength)
I mouth J teeth
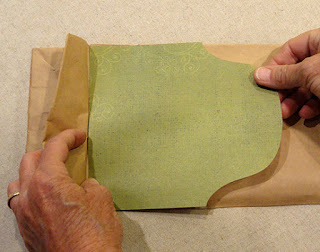
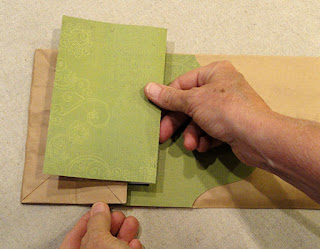
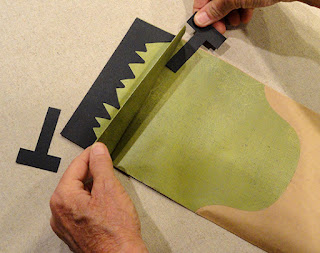
2. On the front of the paper sack, lift the "flap" that
will act as the mouth when puppet functions and
position the top straight edge of the chest shape
even with side fold edges and tucked up against
the flap crease, and glue in place.
NOTE: regular glue stick is a good choice if
the assembly is being done by a child.
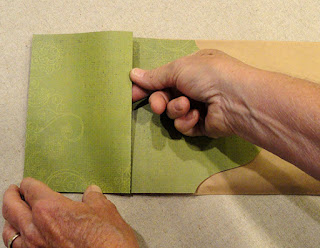
perforation line, then . . .

position over the bottom sack panel with creases
aligned . . .
. . . adjust for side to side alignment, and make sure
the crease folds are snug to each other,
and attach in place.
top edge of head/sack.
 6. If using multiple layers to strengthen neck bolts,
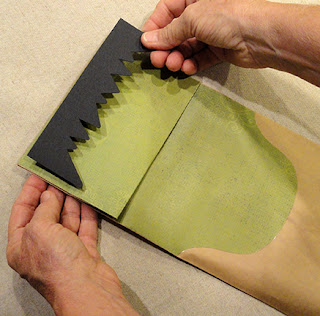
5. Position and attach teeth along bottom edge
of mouth shape.
layer and attach together first. Then, position with
stem extensions under the flap as shown, and
with bolt head approx. 1/2" or so beyond side edge
of sack.
7. Position the mouth assembly with top straight edge
under the sack flap tucked up to crease,
and overlapping the stem ends of bolts as shown,
and glue in place.
 8. Prepare the tunic shape by threading the ends
of the cord from back to front of tunic through
top two holes, then . . .
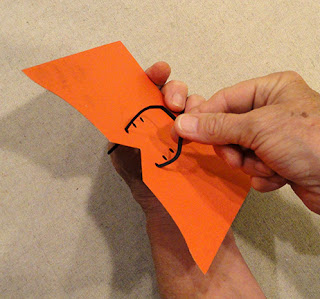 . . . push through completely. Glue in place.
 Also position the 'X' over the bottom pairs of holes
and glue in place.
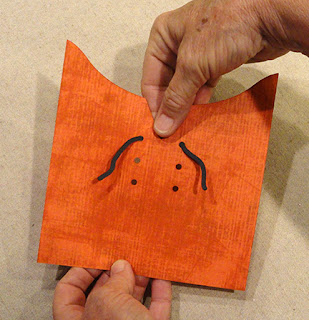
 9. Position the tunic over lower front of sack,
covering the chest panel - adjust up or down as
desired, watching that the bottom cord holes
are above the bottom edge of chest shape.
NOTE that the tunic shape does NOT reach
to the bottom of the sack; trim excess sack away
to match bottom edge if desired.
 10. Position the eye whites, pupils and brows
onto the flap under the hair shape as desired,
in an expressive way.
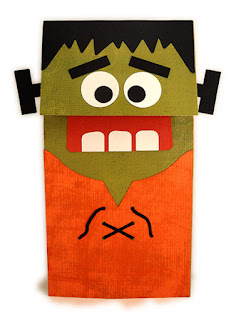
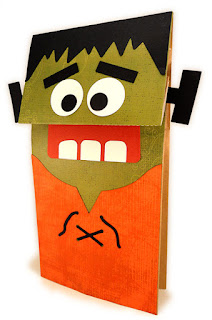
 Here is the completed sack puppet with
an arm inserted ready to scare, bewitch or enchant!


NOTE that the tunic shape does NOT reach
to the bottom of the sack; trim excess sack away
to match bottom edge if desired.
No comments:
Post a Comment