
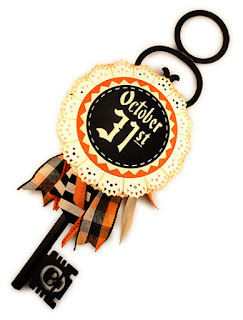
Commemorate
the favorite fall holiday with
a festive rosette that marks the date – October
31st.
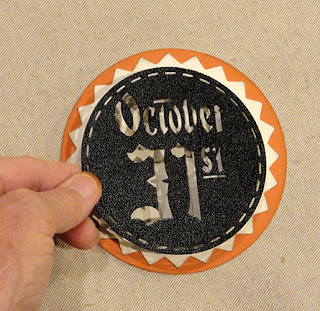
Faux stitching completes the front disc at edge,
with sawtooth layer
behind (shows through letters,
numbers and stitches) and plain edge outer disc.
Pleated spiky eyelet lace panels add pizzazz at outer edge.
On back, hanging
panel is “engineered” with
two fold-out flanges which include punch holes
to
assist with tying to ribbon streamer cluster
or object being decorated – such
as
the “Key to Dungeon 3D Large” separate design.

(An alternate front shape
with punch holes also included.)
Medallion measures approx. just under 6”
diameter
lace to lace edge when fully assembled.
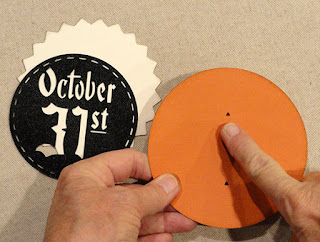
ASSEMBLY: 1. Identify and cut the shapes:
A eyelet box pleat arcs (4)
B medallion base plain circle
C sawtooth edge circle
D front panel
E back panel with attachment flanges & circles
Not shown: opt. back camouflaging circle

on (left) end tab, then back on each side of the wide
panels, and forward on each side of the narrow
panels.
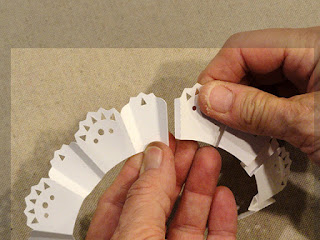
 3. Position the first two arcs next to each other so that
the end tab of right arc aligns behind the straight edge
of the left arc left edge, with bottom edges even,
and join seam. Join four arcs into one length.
 4. Working from the front, glue the front pleats in place by
applying dabs of adhesive behind the folds
as shown, then . . .

and hold in place until secure.
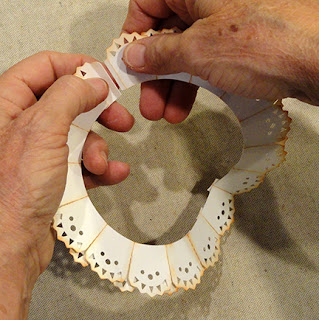
 5. Reverse the arcs to apply glue between pleat
folds, and attach the layers together.
 Here is the first portion of the arc with pleats
glued front and back. Continue until the entire length
has glued pleats, with only the final pleat near final end
remaining unglued, then . . .

the end straight edge as was done for previous seams,
and join final seam. Fold and glue final pleats.
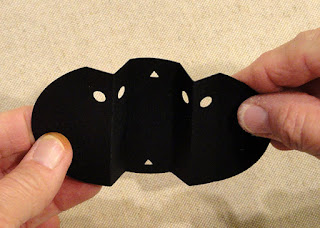
6. Bend the back tie-on panel on perforations
with "mountain folds" between punch holes,
and "valley folds" in each side of "mountain folds".
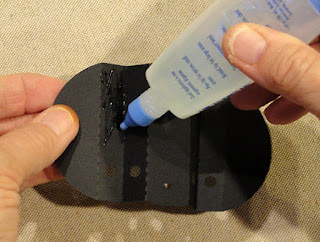
7. Apply glue on one panel of the folded punch hole
panels, then bend the "pleat" together and attach
both surfaces together, aligning punch holes,
and apply pressure until securely glued together.
8. Prepare to join the front three discs by identifying
the arrow vertical center symbols on the base disc.
Arrow symbols should point UPWARD to indicate
the top of the medallion in all steps.
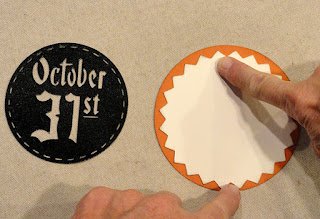
Identify two sawtooth panel points as "centers"
then position these at north and south positions
directly above the arrow symbols of base disc,
adjust for even edge margin, then glue sawtooth
disc in place.
Position the front disc with vertical centerline also
positioned over the sawtooth/base discs' centerlines,
adjust for edge margin consistency, and glue in place.
If possible, press under a heavy flat weight until
thoroughly dry.
identifying the center of one pleat wide panel as
center top, and one directly across as center bottom . . .
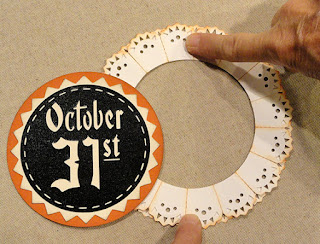 . . . then position the disc assembly with center
aligned on lace center . . .

Reverse the assembly again to adjust so that consistent 11. Position and attach the plain camouflaging disc
width of lace ring is visible, then glue layers together
where they overlap. Press until dry.
on backside to hide the lace panel edges, with
arrow symbols aligned as precisely as possible.
(NOTE this image erroneously used a disc
that did not have the arrow symbols.)

of assembly, and align arrow symbols,
then attach in place.

and color/style ribbons, if desired, and tie the center
with a narrow ribbon or piece of twine. Use center
ribbon ends threaded through punch holes
(inserting from sides toward center) to tie the cluster
in place. Allow long ends if desired to tie medallion onto
intended object.

(awaiting improved arrangement of ribbon ends).
 Here, the medallion with ribbons is attached
to the Dungeon 3D Key design.
No comments:
Post a Comment